
TRIM CASING - FRONT DOOR - FROM 02MY
- Make
- Land Rover
- Model
- Defender TD5 Defender
- Section
- TRIM CASING - FRONT DOOR - FROM 02MY
CHASSIS AND BODY
31
REPAIR
7. Remove seal from glass.
CAUTION: Lay glass on felt covered
supports and be careful not to damage the
obscuration band. Do not stand on edge
as this can cause chips which subsequently
develop into cracks.
Refit
8. Clean glass and fit seal. Ensure seal is fully
located on glass.
9. Thoroughly clean the tail door glass mounting
flange.
10. Fit drawstring to seal.
11. Lubricate seal.
12. With assistance, position glass and seal to
aperture, locate lower edge and fit seal using
drawstring.
13. Clean glass and check seal fit.
14. Connect Lucars to heated rear screen.
15. Fit CHMSL assembly. See ELECTRICAL,
Repair.
16. Fit wiper arm to spindle, align blade to glass and
tighten nut to 18 Nm (13 lbf.ft).
17. Fit spare wheel and tighten nuts to 45 Nm (33
lbf.ft).
TRIM CASING - FRONT DOOR - FROM 02MY
Service repair no - 76.34.01
Remove
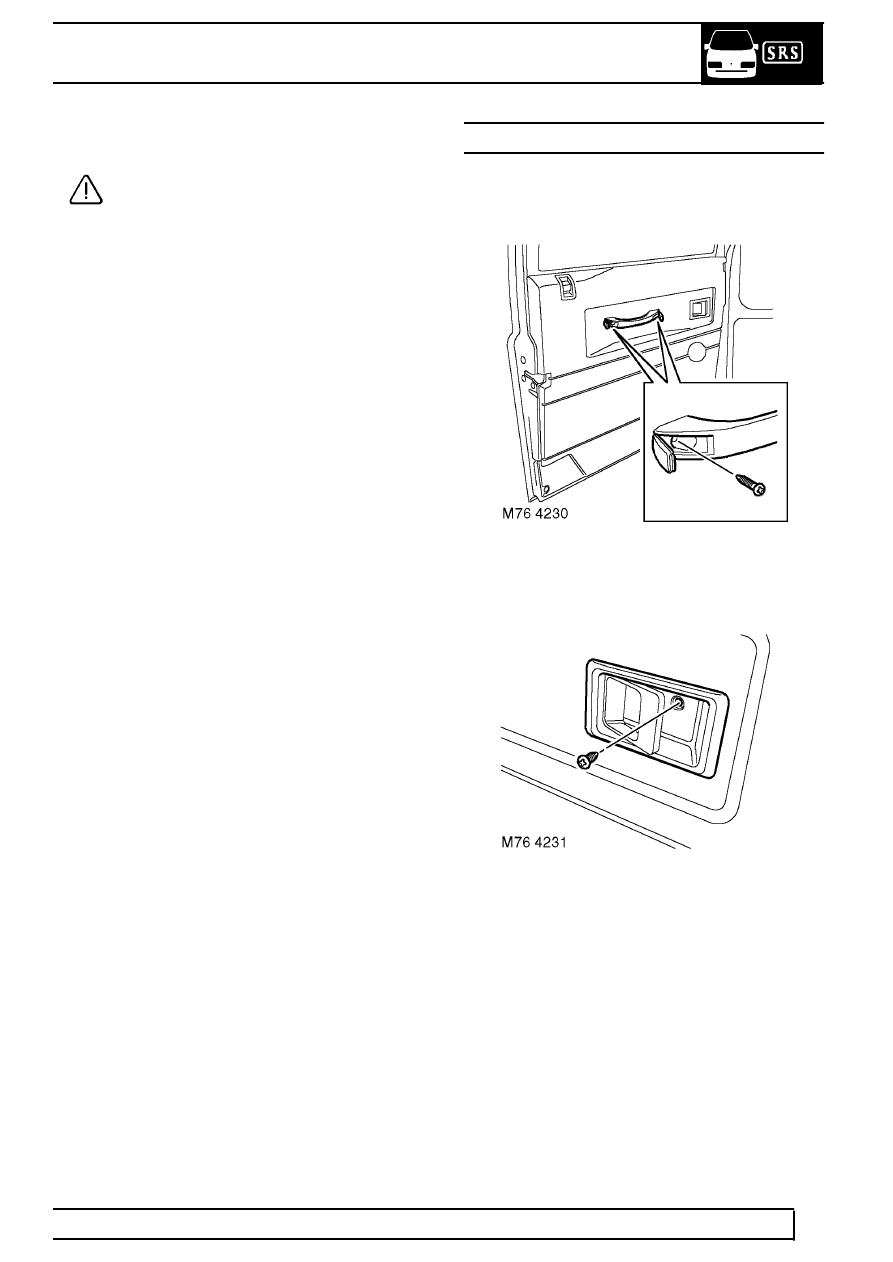
1. Remove 2 screws securing door pull and
remove door pull.
2. Remove screw securing door release
escutcheon and remove escutcheon.
Parts & tools for this job Staging For Land Rover Defender
- TOOLTrim removal tool kitSearch: trim removal tool kit
- PARTTouch-up paintSearch: Land Rover touch up paint
- PARTPanel clip assortmentSearch: Land Rover panel clips assortment
Links open Amazon search results in a new tab. As an Amazon Associate I earn from qualifying purchases.