
BEARING - REAR HUB
- Make
- Land Rover
- Model
- Defender TD5 Defender
- Section
- BEARING - REAR HUB
REAR SUSPENSION
1
REPAIR
BEARING - REAR HUB
Service repair no - 64.15.14
Remove
1. Raise rear of vehicle.
WARNING: Support on safety stands.
2. Remove rear road wheel.
3. Remove 2 bolts securing brake caliper to hub.
4. Release caliper from disc and tie aside.
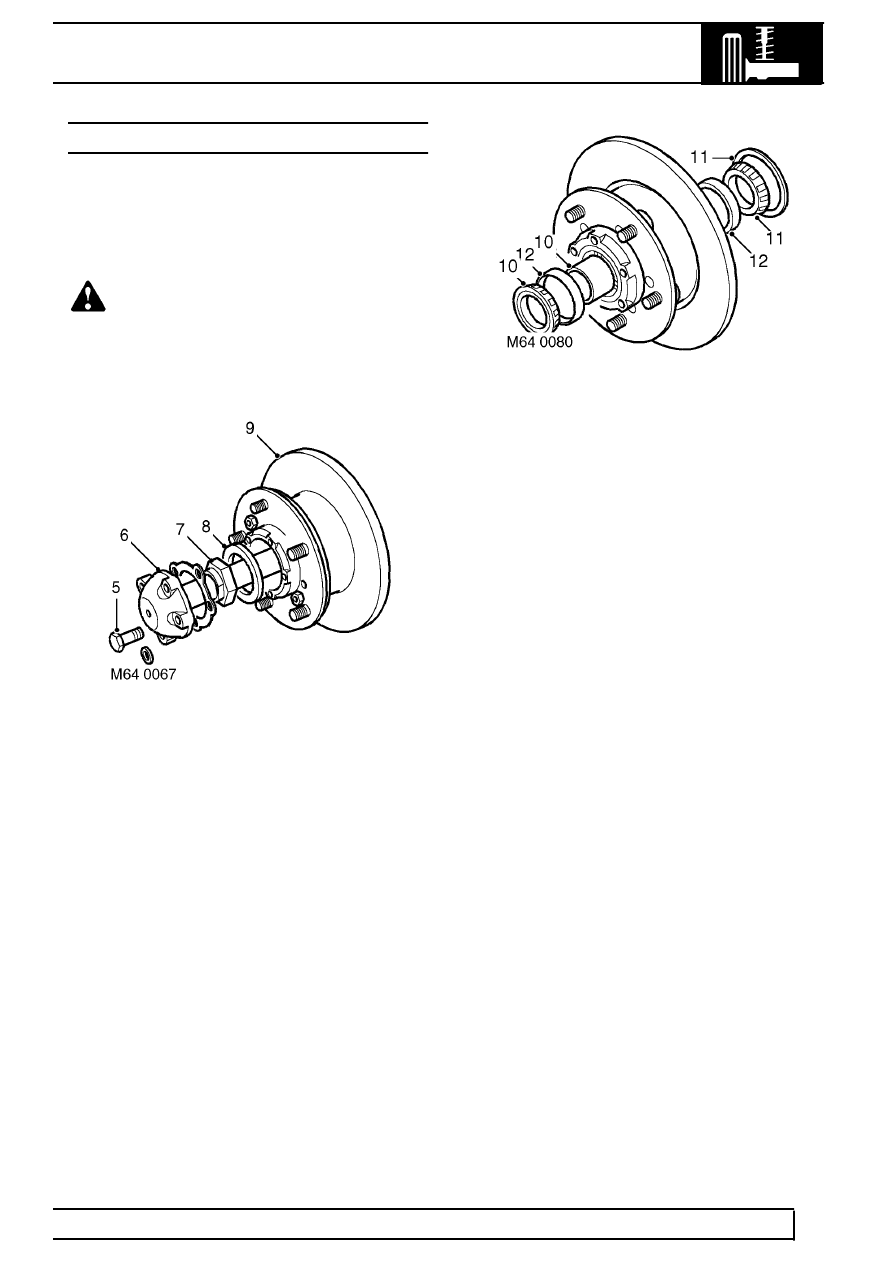
5. Remove 5 bolts securing axle shaft.
6. Remove axle shaft and discard gasket.
7. Knock back staking, and using a suitable socket,
remove and discard stake nut.
8. Remove hub nut washer.
9. Remove hub and brake disc assembly complete
with bearings.
10. Remove outer bearing and spacer from hub.
11. Remove grease seal and inner bearing from
hub.
12. Remove inner and outer bearing tracks from
hub.
Refit
13. Clean hub and bearing locations.
14. Fit inner and outer bearing tracks to hub.
15. Pack inner bearing with grease and fit to hub.
16. Fit new grease seal flush with rear face of hub
using LRT-54-003 and LRT-99-003.
17. Clean stub axle.
18. Pack outer bearing with grease, fit spacer and
bearing to hub.
19. Fit hub assembly to stub axle, remove
LRT-54-019.
20. Fit washer and new hub nut and tighten to 30
Nm (22 lbf.ft).
21. Rotate and push/pull hub to settle bearings.
Tighten hub nut to 210 Nm (150 lbf.ft).
22. To check drive shaft end float, mount a dial
gauge using bracket LRT-99-503 to driving
member bolt hole.
23. Ensure dial gauge is contacting hub nut face.
24. Move drive shaft in and out noting dial gauge
reading.
Parts & tools for this job Staging For Land Rover Defender
- PARTRear wheel bearingSearch: Land Rover Defender rear wheel bearing
- TOOLBearing puller kitSearch: wheel bearing puller kit
- PARTCV boot kitSearch: Land Rover Defender cv boot kit
Links open Amazon search results in a new tab. As an Amazon Associate I earn from qualifying purchases.