
LOWER FASCIA PANEL - FROM 02MY
- Make
- Land Rover
- Model
- Defender TD5 Defender
- Section
- LOWER FASCIA PANEL - FROM 02MY
76
CHASSIS AND BODY
36
REPAIR
LOWER FASCIA PANEL - FROM 02MY
Service repair no - 76.46.05
Service repair no - 80.10.12
NOTE: This procedure also covers
removal of the air distribution control
cable, 80.10.12.
Remove
1. Disconnect battery negative lead. See
ELECTRICAL, Repair.
2. Remove steering column nacelle. See
STEERING, Repair.
3. Remove fascia console. See this Section.
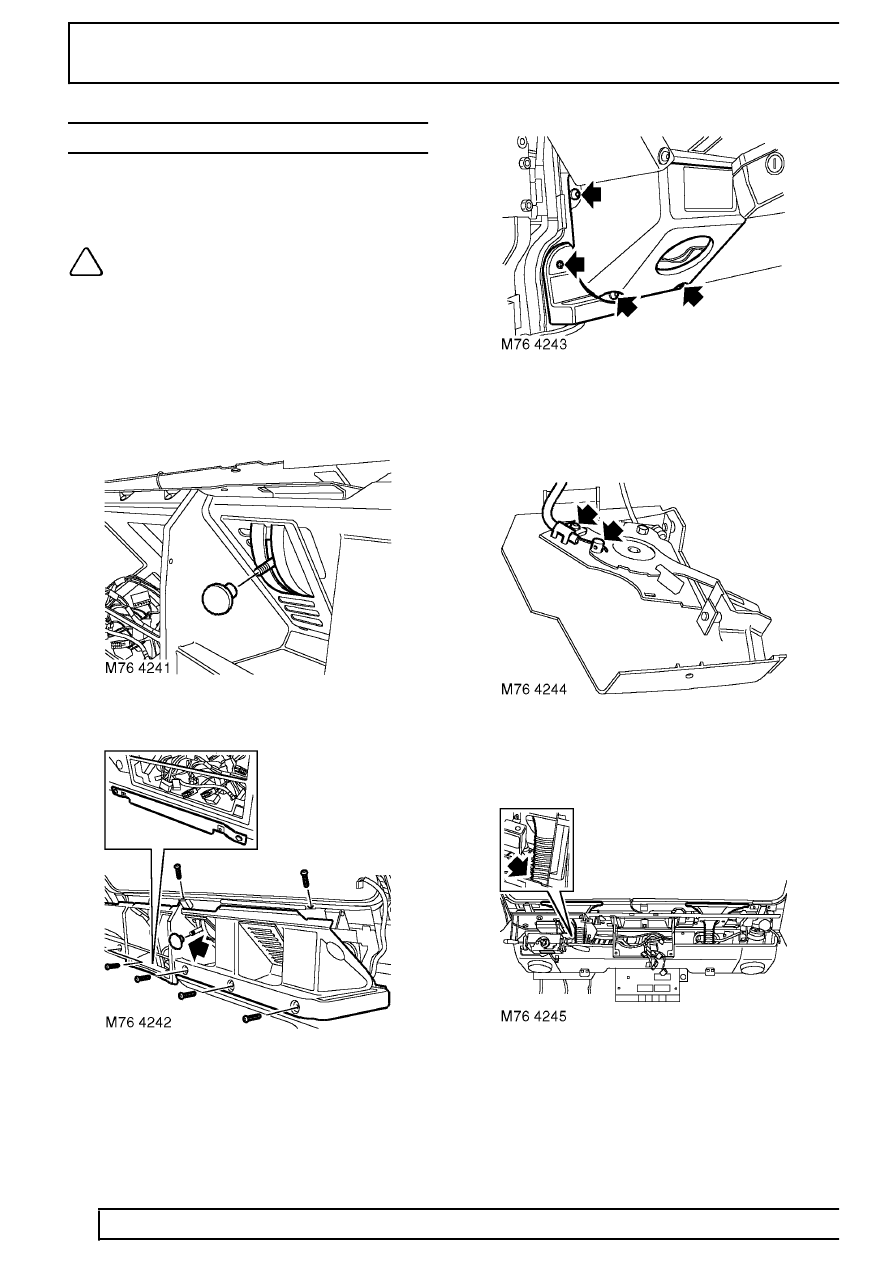
4. Remove air vent control knobs.
5. Remove 6 screws, remove fascia closing panel
and collect nut plate.
6. Remove speakers. See ELECTRICAL, Repair.
7. Remove 2 screws and remove both door check
strap covers.
8. Remove 3 screws and remove end cap from
lower fascia panel.
9. Loosen grub screw and clamp plate bolt
securing air distribution cable. Release cable
from control lever.
10. Release screen demister tubes from lower fascia
panel.
Parts & tools for this job Staging For Land Rover Defender
- TOOLTrim removal tool kitSearch: trim removal tool kit
- PARTTouch-up paintSearch: Land Rover touch up paint
- PARTPanel clip assortmentSearch: Land Rover panel clips assortment
Links open Amazon search results in a new tab. As an Amazon Associate I earn from qualifying purchases.