
Exhaust pipe assembly - r + r
- Make
- Fiat
- Model
- Ulysse Factory Service Manual
- Year
- 2002–2010
- Section
- Exhaust pipes and silencers › Exhaust pipe assembly - r + r
EXHAUST PIPE ASSEMBLY - R + R
Removing
- Position the vehicle on a lift.
1. Working inside the luggage compartment, open the protective cap and loosen the spare wheel fastening.
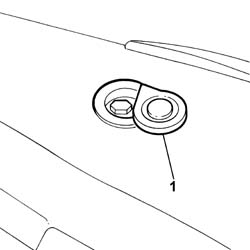
- Raise the vehicle.
1. Disconnect the electrical connections securing the front and rear Lambda sensors to the catalytic converter.
| Description | Connector | |
|---|---|---|
| Lambda sensor on the catalytic converters | See K017 Lambda sensor on catalyzer |
| Description | Connector | |
|---|---|---|
| Lambda sensor on the catalytic converters -2 | See K018 Lambda sensor on catalyzer - 2 |
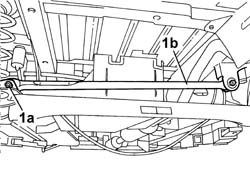
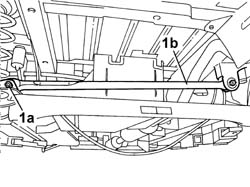
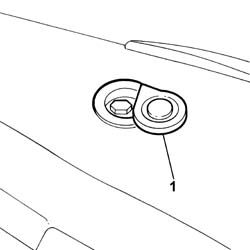
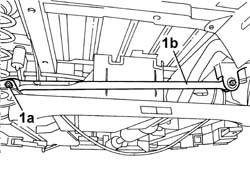
1. Undo the fixing nuts (1a) and remove the rear axle reinforcement bar (1b).
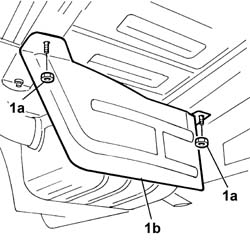
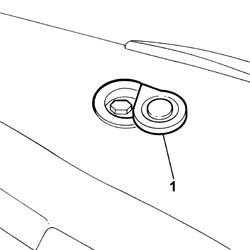
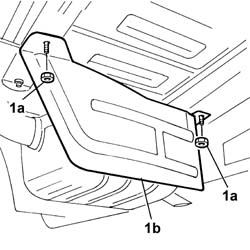
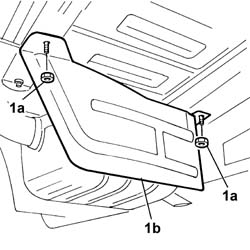
1. Undo the fixing nuts (1a) and remove the heat shield (1b).
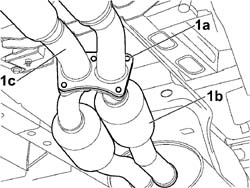
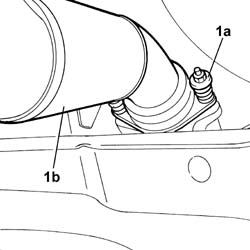
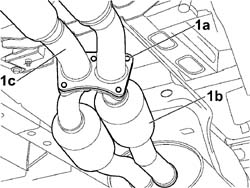
1. Working in the area of the front axle, undo the fastenings (1a) and separate the exhaust pipe (1b) from the exhaust manifold.
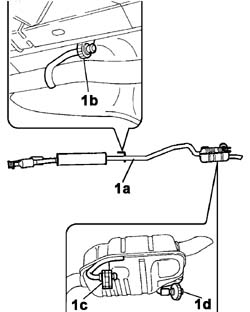
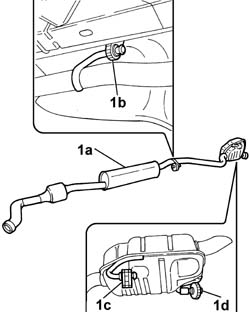
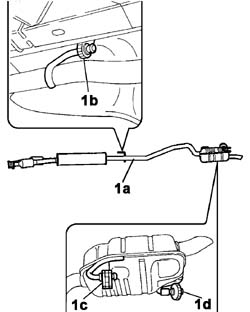
1. Remove the exhaust pipe (1a) releasing it from the centre (1b) and rear fastening points (1c) and (1d).
Refitting
- Place the exhaust pipe in position, securing it at the centre and rear fastenings.
- Tighten the exhaust pipe fastenings on the exhaust manifold to torque.
| Value daNm | Fastening | Component | ||
|---|---|---|---|---|
| 2.5 | Nut | Joint strip |
- Position the nuts fixing the rear silencer heat shield and tighten them.
- Position the rear axle reinforcement bar and tighten the fixing nuts to torque.
| Value daNm | Fastening | Component | ||
|---|---|---|---|---|
| 6 | Nuts | Rear axle reinforcement bar |
- Connect the electrical connections for the Lambda sensors.
| Description | Connector | |
|---|---|---|
| Lambda sensor on the catalytic converters | See K017 Lambda sensor on catalyzer |
| Description | Connector | |
|---|---|---|
| Lambda sensor on the catalytic converters -2 | See K018 Lambda sensor on catalyzer - 2 |
- Fit the spare wheel.
- Remove the vehicle from the lift.
Removing
Position the vehicle on a lift.
1. Working inside the luggage compartment, open the protective cap and loosen the spare wheel fastening.
1. Undo the fixing nuts (1a) and remove the rear axle reinforcement bar (1b).
1. Undo the fixing nuts (1a) and remove the heat shield (1b).
1. Working in the area of the front axle, undo the fastenings (1a) and separate the exhaust pipe (1b) from the exhaust manifold.
1. Remove the exhaust pipe (1a) releasing it from the centre (1b) and rear fastening points (1c) and (1d).
Refitting
Place the exhaust pipe in position, securing it at the centre and rear fastenings.
Tighten the exhaust pipe fastenings on the exhaust manifold to torque.
| Value daNm | Fastening | Component | Ø | |
|---|---|---|---|---|
| 4.5 | Nuts | Ball joint fastenings |
Position the nuts fixing the rear silencer heat shield and tighten them.
Position the rear axle reinforcement bar and tighten the fixing nuts to torque.
| Value daNm | Fastening | Component | Ø | |
|---|---|---|---|---|
| 6 | Nuts | Rear axle reinforcement bar |
Fit the spare wheel.
Remove the vehicle from the lift.
Removing
- Position the vehicle on a lift.
1. Working inside the luggage compartment, open the protective cap and loosen the spare wheel fastening.
- Raise the vehicle.
Op. 7055B54 UNDER-ENGINE GUARD - R R
1. Undo the fixing nuts (1a) and remove the rear axle reinforcement bar (1b).
1. Undo the fixing nuts (1a) and remove the heat shield (1b).
1. Working in the front area of the vehicle, undo the fixing nuts (1a) and separate the exhaust pipe (1b) from the right precatalyzer (1c).
1. Remove the exhaust pipe (1a) releasing it from the centre (1b) and rear fastening points (1c) and (1d).
Refitting
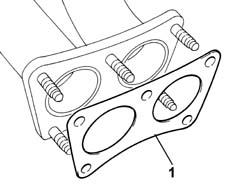
1. Place the gasket for the flange between the exhaust pipe and the right pre-catalyzer in position.
Always replace the flange with a new part.
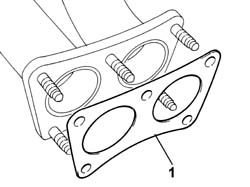
Always replace the flange with a new part.
- Place the exhaust pipe in position, securing it at the centre and rear fastenings.
- Place the flange fixing nuts in position and tighten them.
Always replace the precatalyzer fixing nuts with new parts.
- Tighten the nuts securing the preconverter to the exhaust pipe to the specified torque.
| Value daNm | Fastening | Component | Ø | |
|---|---|---|---|---|
| 6 | nuts | Rear axle reinforcement bar |
- Place the rear silencer heat shield in position and tighten the fixing nuts.
- Position the rear axle reinforcement bar and tighten the fixing nuts to torque.
- Fit the spare wheel and tighten the fastening.
- Remove the vehicle from the lift.
Parts & tools for this job Staging For 2002 Fiat Ulysse
- PARTExhaust gasketSearch: Fiat Ulysse 2002 exhaust gasket
- TOOLPenetrating oilSearch: penetrating oil
- TOOLOBD2 scannerSearch: OBD2 scanner
Links open Amazon search results in a new tab. As an Amazon Associate I earn from qualifying purchases.