
BATTERY - DISCONNECT - FROM 02MY
- Make
- Land Rover
- Model
- Defender TD5 Defender
- Section
- BATTERY - DISCONNECT - FROM 02MY
86
ELECTRICAL
8
REPAIR
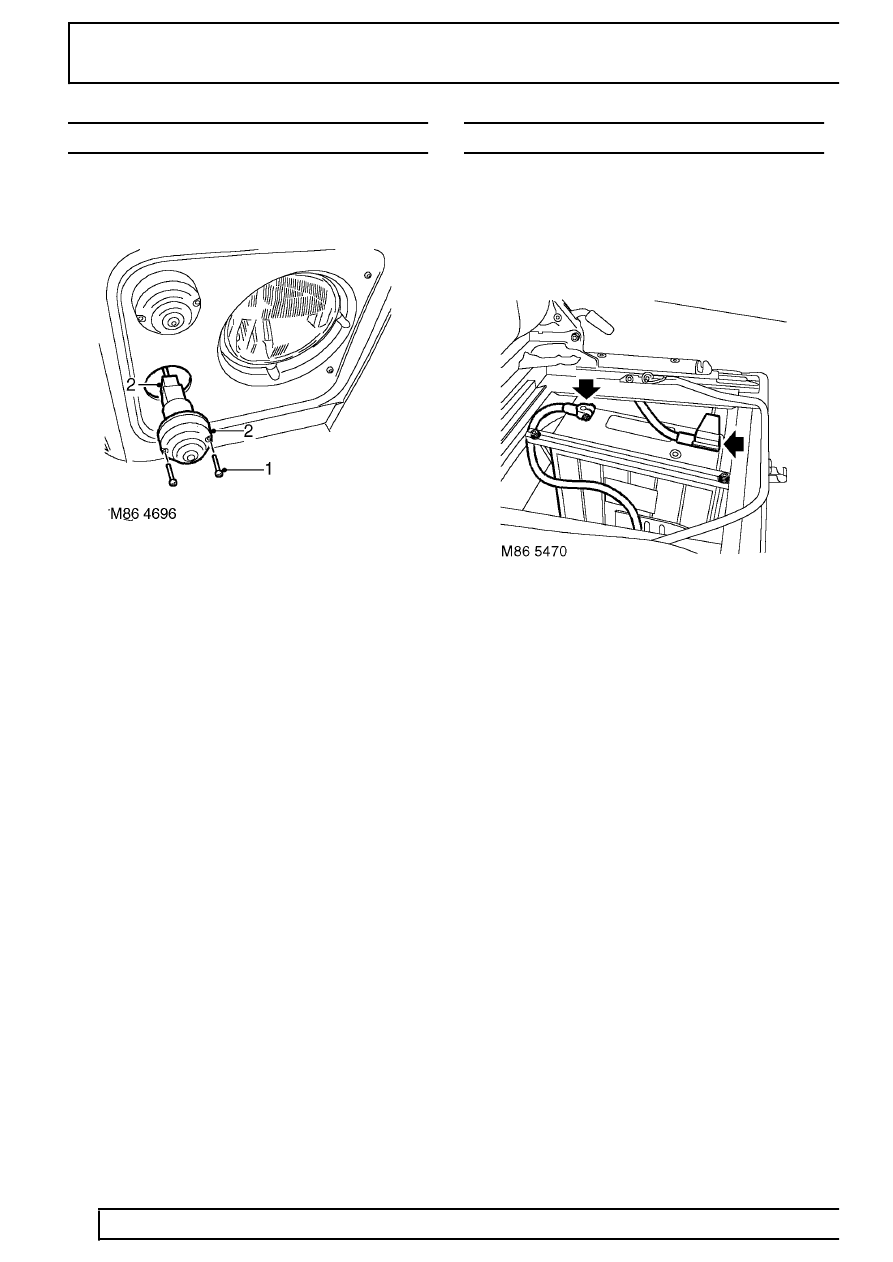
LAMP - FRONT FLASHER
Service repair no - 86.40.42
Remove
1. Remove 2 screws securing flasher lamp to front
wing.
2. Disconnect multiplug and remove lamp.
Refit
3. Position flasher lamp and connect multiplug.
4. Fit and tighten lamp securing screws.
BATTERY - DISCONNECT - FROM 02MY
Service repair no - 86.15.99
Remove
1. Remove front seat cushion.
2. Release clip and remove battery cover.
3. Loosen bolt securing negative earth lead, do not
remove lead at this stage.
4. Fit ignition key, turn to position ’II’. Turn ignition
off, remove key from lock and immediately
remove negative lead.
Refit
5. Connect negative lead to negative terminal and
tighten bolt to 10 Nm (7 lbf.ft).
6. Fit and secure battery cover.
7. Fit seat cushion.
Parts & tools for this job Staging For Land Rover Defender
- TOOLBattery testerSearch: car battery tester
- TOOLDigital multimeterSearch: automotive digital multimeter
- TOOLBattery terminal cleanerSearch: battery terminal cleaner
Links open Amazon search results in a new tab. As an Amazon Associate I earn from qualifying purchases.