
R.r. front panel (level 2)
- Make
- Fiat
- Model
- Ulysse Factory Service Manual
- Year
- 2002–2010
- Section
- Removing refitting › R.r. front panel (level 2)
R.R. FRONT PANEL (LEVEL 2)
The vehicle should be in the following condition before the operation: front bumper detached, front wing detached, front wing crossmember detached, front crossmember detached, bonnet lid detached
Removing
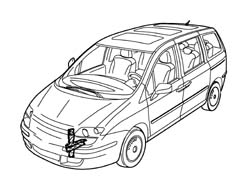
- Work on the component highlighted having previously made sure that the equipment illustrated below is available.
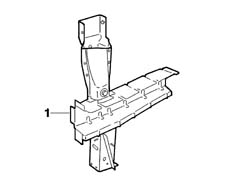
1. Crossmember, front section.
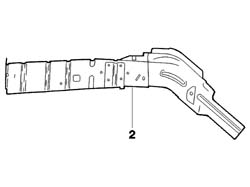
2. Crossmember closing device.
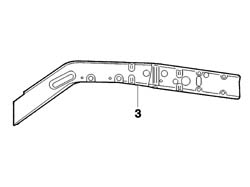
3. Front side member reinforcement.
- Check that the components connected are not distorted by checking the bodyshell alignment measurements using suitable equipment (gauges, templates or jigs).
Carry out any bodyshell straightening operations before cutting the component.
- Make the cuts and holes in the crossmember closing device as illustrated in the diagram using a power saw and an 8 mm diameter drill bit.
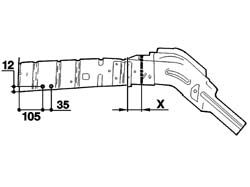
- Make the cuts in the front side member reinforcement as illustrated in the diagram using a power saw.
Remove the anti-corrosion treatment in the replacement part contact areas using a rotary brush and apply electro-galvanizing paint.
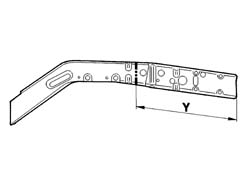
- Make the cuts following the measurements illustrated using a power saw.
- Reduce the spot welds illustrated using a chamfering machine.
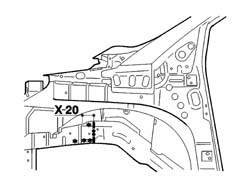
- Cut the element at point (A) using a power saw.
- Remove the weld spots using a chamfering machine and a drill.
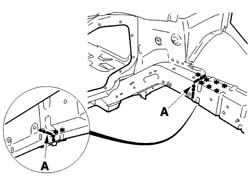
- Cut the element reinforcement at the point indicated using a power saw.
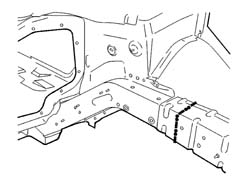
- Remove the residues from the bodyshell using a disc grinder and apply electro-galvanizing paint.
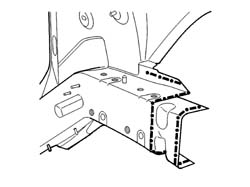
Refitting
- Position the front section of the element and the reinforcement and fasten using self-locking clamps then, after having checked that the alignment is correct, cut the element reinforcement and remove and level the residues on the replacement part using a disc grinder and then apply electro-galvanizing paint.
- Position the front section of the element, the element reinforcement produced previously, the front section of the crossmember and the front wheel arch and fasten using self-locking clamps; then, after having checked that the alignment is correct, cut the front section of the crossmember.
- Remove the front wheel arch and the front section of the crossmember removing and levelling the residues on the replacement part and then applying electro-galvanizing paint.
- Position the element reinforcement and MIG weld as indicated in the diagram then grind the welds using a disc grinder.
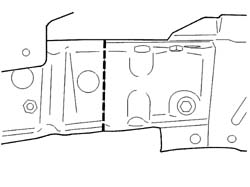
- Position the element and MIG weld as indicated in the diagram then grind the welds using a disc grinder.
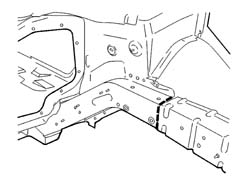
- Weld the top part of the element as illustrated in the diagram using a spot welder.
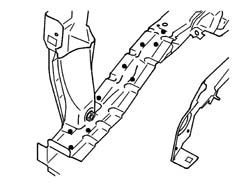
- Weld the bottom part of the element and the front section of the crossmember as illustrated in the diagram using a spot welder.
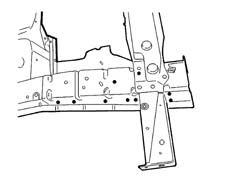
- Weld the bottom part of the element and the front section of the crossmember and the front wheel arch as illustrated in the diagram using a spot welder.
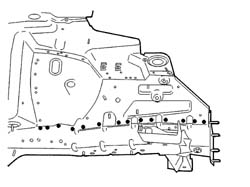
- Continue with the MIG welding (B) and then using a spot welder as illustrated in the diagram then grind the welds using a disc grinder.
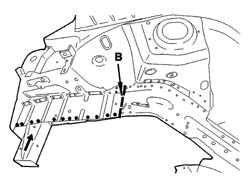
- Grind the welds using a disc grinder.
- Check that the welded component is correctly positioned.
- Apply electro-galvanizing paint to the ground parts.
- Proceed with waxing the box sections.
When the operation is completed, refit the elements removed previously.
Parts & tools for this job Staging For 2002 Fiat Ulysse
- TOOLTrim removal tool kitSearch: trim removal tool kit
- PARTTouch-up paintSearch: Fiat touch up paint
- PARTPanel clip assortmentSearch: Fiat panel clips assortment
Links open Amazon search results in a new tab. As an Amazon Associate I earn from qualifying purchases.