
Bottom cover
- Make
- Land Rover
- Model
- Gearboxes LT230Q Transfer Box
- Section
- TRANSFER BOX ASSEMBLING › Bottom cover
TRANSFER BOX
OVERHAUL
47
6. When torque to turn figure - intermediate gear
bearing pre-load is correct, stake flange of
intermediate shaft nut into recess in
intermediate shaft.
7. Remove tool LRT-41-005.
NOTE: Discovery cover plate illustrated.
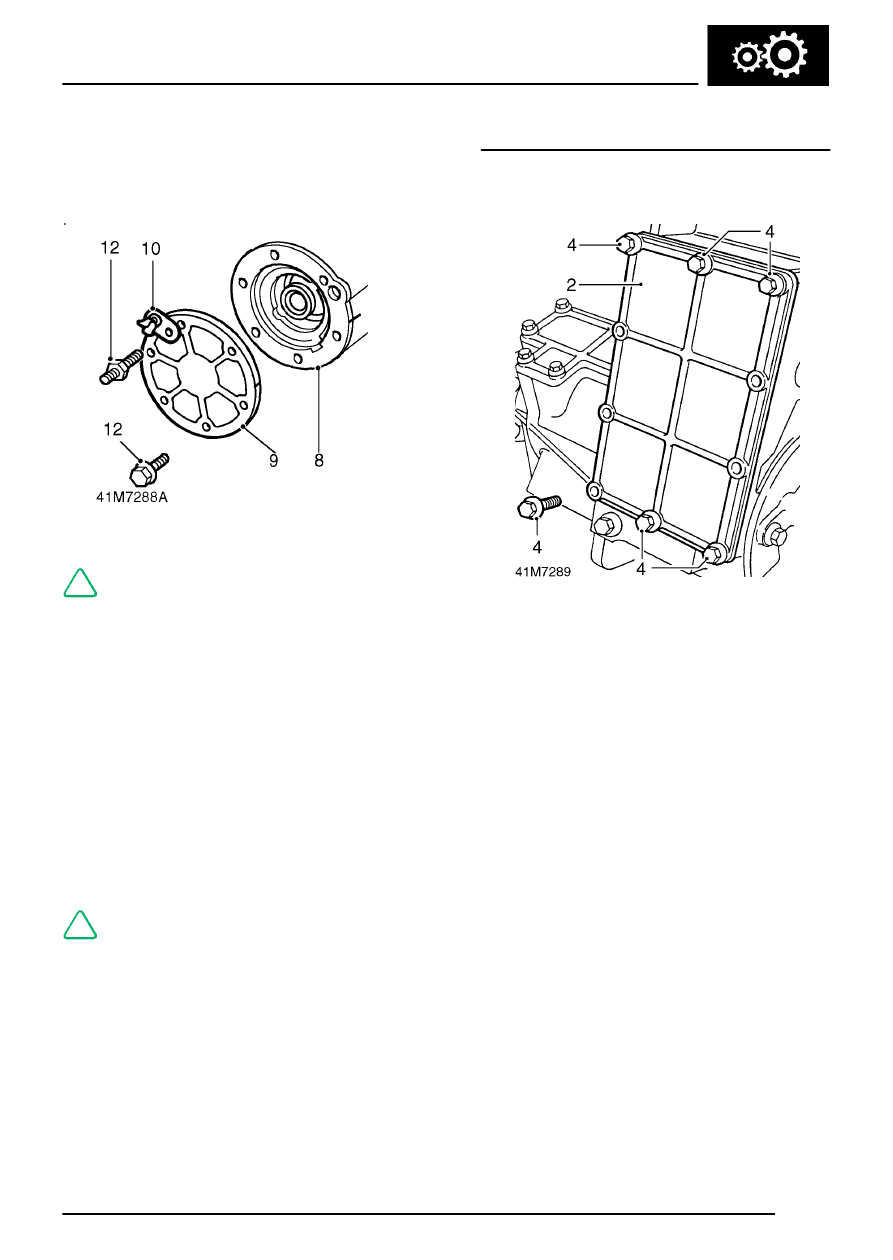
8. Remove 2 bolts used to temporarily secure
mainshaft input gear bearing housing, remove
housing. Apply Hylosil 2000 sealant to main
casing mating face of bearing housing, position
housing on main casing ensuring reference
marks are aligned.
9. Apply Hylosil RTV 102 sealant to mating face
of cover plate/power take-off cover, position
plate/cover on bearing housing ensuring that
reference marks are aligned.
10. Position clip to stud nut.
11. Apply Loctite 290 to threads of bolts and stud
nut.
12. Fit 5 bolts and stud nut and tighten by diagonal
selection to 25 Nm (18 lbf.ft).
NOTE: These bolts are threaded to head.
Bottom cover
1. Apply Hylosil RTV 102 sealant to mating face
of bottom cover.
2. Fit bottom cover.
3. Apply Loctite 290 to threads of bottom cover
securing bolts
4. Fit bolts in positions shown and tighten by
diagonal selection to 25 Nm (18 lbf.ft.
Parts & tools for this job Staging For Land Rover Gearboxes
- TOOLTorque wrenchSearch: 3/8 inch torque wrench
- TOOLSocket setSearch: socket set metric
- BOOKHaynes manualSearch: Haynes manual Land Rover Gearboxes
Links open Amazon search results in a new tab. As an Amazon Associate I earn from qualifying purchases.