
VISCOUS COUPLING AND FAN
- Make
- Land Rover
- Model
- Defender 300Tdi Defender
- Section
- VISCOUS COUPLING AND FAN
COOLING SYSTEM
1
REPAIR
VISCOUS COUPLING AND FAN
Service repair no - 26.25.19 - Viscous coupling
Service repair no - 26.25.05 - Fan
Remove
NOTE: The viscous coupling has a LH
thread.
1. Disconnect battery.
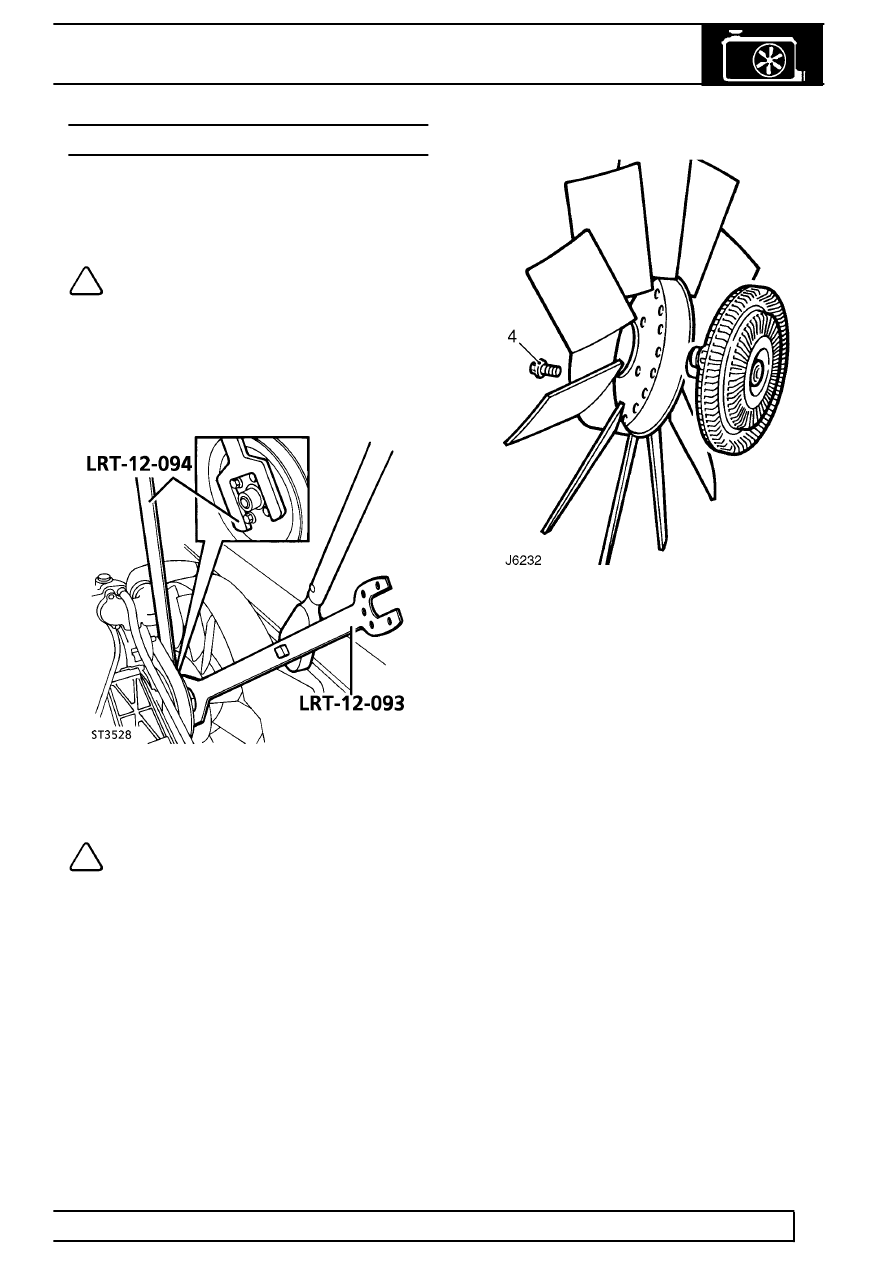
2. Using special pulley restraining tool LRT-12-094
and special spanner LRT-12-093 unscrew
viscous coupling from pulley hub adaptor thread.
3. Remove viscous coupling and fan from vehicle.
NOTE: If air conditioning is fitted, the fan
cowl will also need removing,
See Fan
cowl , with the viscous fan unit.
4. If required, remove 4 screws and release
viscous unit from fan blade.
Refit
5. Fit viscous unit to fan blades.
6. If applicable, fit fan cowl.
See Fan cowl
7. Carefully position viscous coupling and fit onto
pulley hub adaptor thread.
8. Using special pulley retaining tool, spanner and
a suitable torque wrench, tighten assembly to
45
Nm (33 lbf/ft).
Parts & tools for this job Staging For Land Rover Defender
- FLUIDCoolantSearch: Land Rover coolant antifreeze
- PARTThermostatSearch: Land Rover Defender thermostat
- TOOLCooling system pressure testerSearch: cooling system pressure tester
Links open Amazon search results in a new tab. As an Amazon Associate I earn from qualifying purchases.