
LOWER FASCIA PANEL (HEATER DUCT) ASSEMBLY (page 3 of 3)
- Make
- Land Rover
- Model
- Defender 300Tdi Defender
76
CHASSIS AND BODY
36
REPAIR
26. Release demist hose and lift parcel shelf from
lower fascia panel (heater duct). Feed main
harness leads and plugs through aperture in
parcel shelf.
27. Remove parcel shelf.
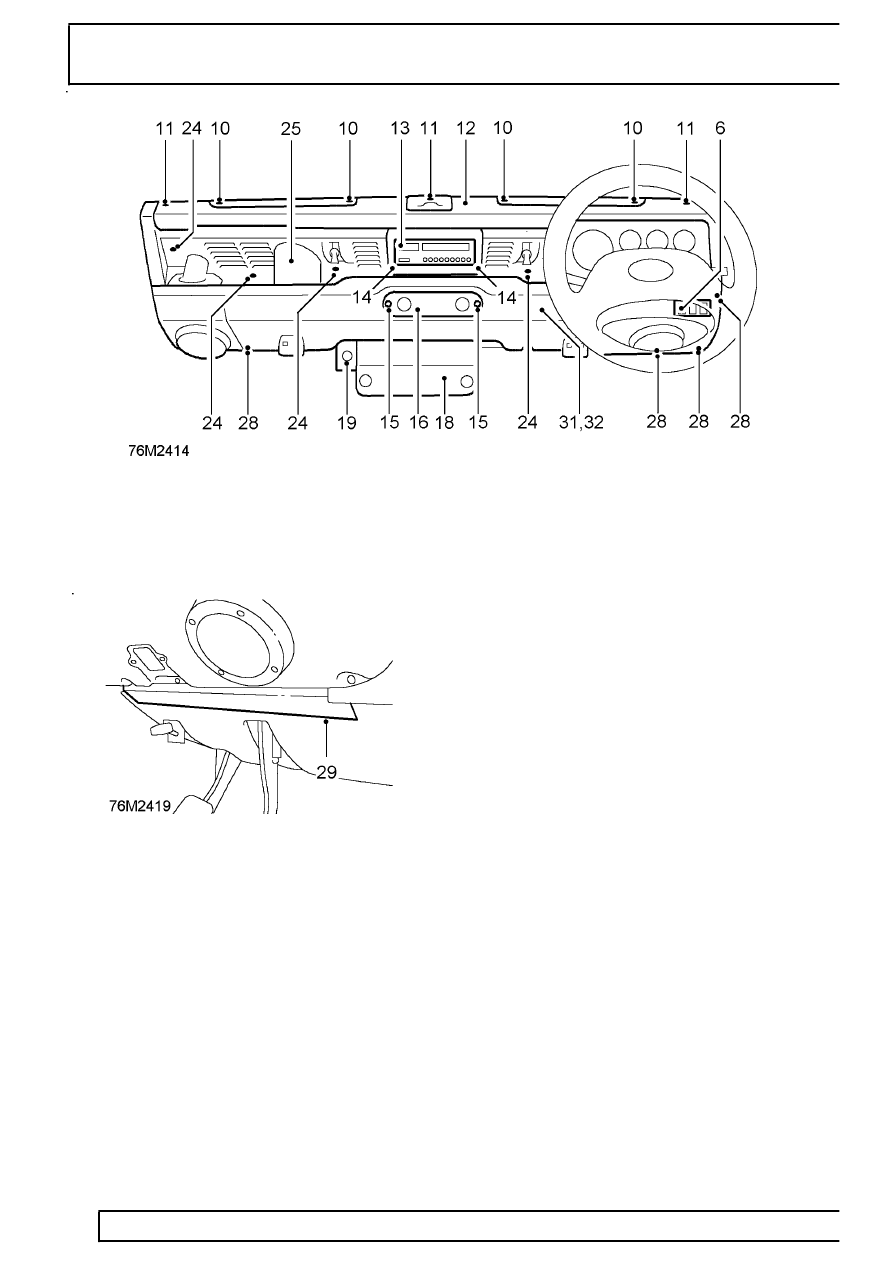
28. Remove 7 screws securing bottom edge of lower
fascia panel to fascia bulkhead, noting position
of both footwell cover retaining plates.
29. Remove both retaining plates and lower footwell
covers.
30. Unscrew 2 retaining bolts securing top edge of
lower fascia panel to bulkhead.
31. With assistance, lower fascia panel and, if
applicable, disconnect RH radio speaker leads.
32. Remove fascia panel from vehicle.
Refit
33. Position lower fascia panel to bulkhead,
reconnect RH speaker leads, if applicable, and
secure top edge with 2 bolts.
34. Locate RH footwell cover retaining plate under
bottom edge of fascia panel and secure with 3
screws.
35. Repeat operation for LH footwell cover retaining
plate.
36. Fit remaining lower fascia panel fixing screws.
37. Locate parcel shelf. Ensure all radio and
auxiliary switch panel harness leads and plugs
are fed through aperture in parcel shelf.
38. Fit demist hoses into heater duct of lower fascia
panel. Ensure flanges of hose grommets are
correctly seated.
39. Fit trim panel and secure with cap fasteners.
40. Reconnect LH speaker leads, if applicable,
locate wiper motor cover pins in lower fascia
panel and secure wth 3 screws. Ensure wiper
rack cover is correctly seated. On LH drive
vehicles, reconnect multi-plugs to rear of switch
panel.
41. Secure finisher to wiper motor cover.
42. Fit door check strap covers on both sides.
43. Fit footwell vents to lower fascia panel.
44. Models fitted with hand throttle:
Fit hand throttle cover.
Secure LH side of fuse box.
45. Fit fuse box cover.
46. Fit auxiliary switch cover to parcel tray, if
applicable.
Parts & tools for this job Staging For Land Rover Defender
- TOOLA/C manifold gauge setSearch: AC manifold gauge set
- TOOLUV leak detection kitSearch: AC UV leak detection kit
- PARTCabin filterSearch: Land Rover Defender cabin filter
Links open Amazon search results in a new tab. As an Amazon Associate I earn from qualifying purchases.