
Coolant change
- Make
- Lancia
- Model
- Ypsilon Factory Service Manual
- Year
- 2003–2011
- Section
- New units and planned maintenance. › Coolant change
Coolant change
1. With the engine cold, remove the cap from the engine coolant reservoir.
When the engine is hot, do not remove the tank cap; there is a danger of burn injury.
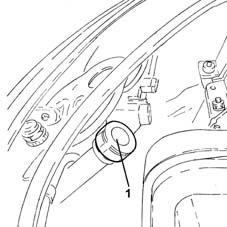
1. With the engine cold, remove the cap from the engine coolant reservoir.
When the engine is hot, do not remove the tank cap; there is a danger of burn injury.
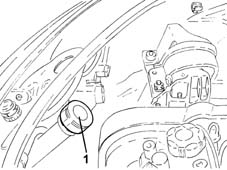
1. With the engine cold, remove the cap from the engine coolant reservoir.
When the engine is hot, do not remove the tank cap; there is a danger of burn injury.
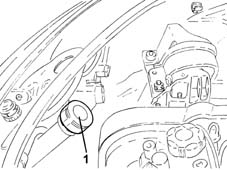
1. With the engine cold, remove the cap from the engine coolant reservoir.
When the engine is hot, do not remove the tank cap; there is a danger of burn injury.
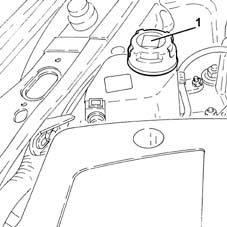
Position a suitable container beneath the radiator to collect the coolant.
1. Loosen the band and disconnect the lower radiator coolant outlet hose from the radiator, radiator side.
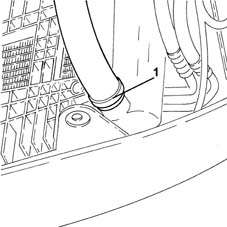
Position a suitable container beneath the radiator to collect the coolant.
1. Loosen the band and disconnect the lower radiator coolant outlet hose from the radiator, radiator side.
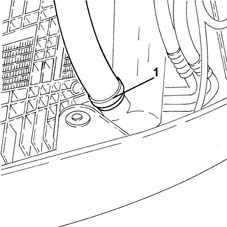
Position a suitable container beneath the radiator to collect the coolant.
1. Loosen the band and disconnect the lower radiator coolant outlet hose from the radiator, radiator side.
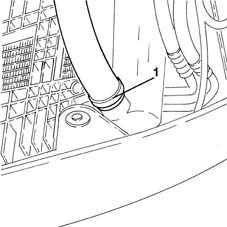
Position a suitable container beneath the radiator to collect the coolant.
1. Loosen the band and disconnect the lower radiator coolant outlet hose from the radiator, radiator side.
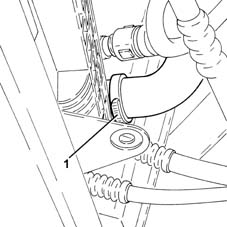
1. Open the bleed located on the radiator.
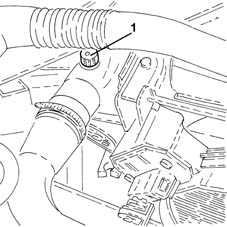
1. Open the bleed located on the radiator.
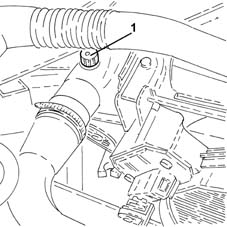
1. Open the bleed located on the radiator.
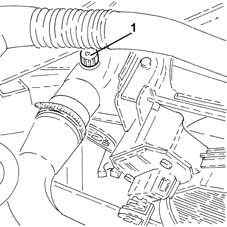
Proceed with removal Refer to op. 1048A10 air cleaner filtering element - replace.
1. Open the bleed located on the radiator.
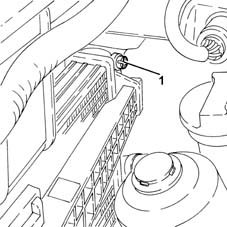
1. Open the bleed located on the coolant return pipe from the heater.
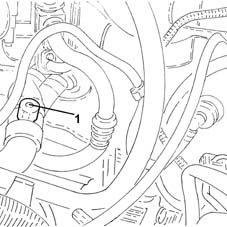
1. Open the bleed located on the coolant return pipe from the heater.
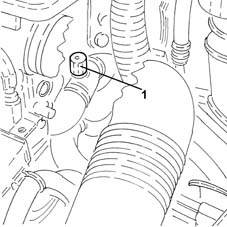
1. Open the bleed located on the coolant return pipe from the heater.
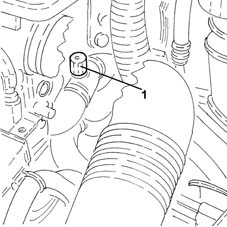
1. Open the bleed located on the single fluid supply and return pipe to/from the heater.
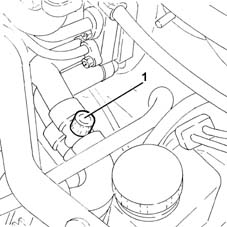
Connect the lower coolant outlet hose from the radiator, radiator side, and tighten the band.
Slowly pour the specified coolant into the engine coolant reservoir until fluid comes out of the bleed located on the radiator.
| Type | Component | Name | Qty. | |
|---|---|---|---|---|
| Fluid | "PARAFLU" ANTI-FREEZE FLUID | Mixture of 50% PARAFLU UP /water | 4.6 |
The table shows the total quantity of coolant contained in the circuit with the level on the MAX notch on the reservoir.
Close the bleed located on the radiator.
At this point the level will be higher than the MAX notch.
Continue filling until the engine coolant reservoir is completely full and fluid comes out of the bleed located on the coolant return pipe from the heater.
Close the bleed located on the coolant return pipe from the heater.
At this point the engine coolant reservoir is completely full, and so exceeds the MAX notch.
Fully tighten the cap on the engine coolant reservoir.
For cars with air conditioning, make sure that the air conditioner is off (OFF position).
Start the engine and let it idle for about two or three minutes.
Pump the accelerator gradually at intervals (every 30 seconds or so) up to about 3000 rpm, until the cooling fan switches on and off at least three times in order to discharge air from the system.
During this operation, if the level approaches the MIN notch, unscrew the plug very carefully and top up the fluid in the reservoir to the MAX notch.
The engine coolant reservoir level must never drop below the MIN notch.
Pump the accelerator again for a period of 10 min., bringing the engine rpm up to about 4500 rpm.
Stop the engine
After allowing the engine to cool down, if necessary top up to the MAX notch indicating the maximum permitted level inthe expansion tank, or if there is an excess, remove using a syringe.
The quantity of fluid added must at least correspond to that recovered during draining of the system;
If the coolant boils during the operations with the engine running, the operation should be stopped in order to search for and if necessary replace the faulty component which has caused this.
Once the system has been filled in accordance with the above method, the bleeds must not be unscrewed at all. Failure to respect this requirement will result in the level in the system being incorrect and new air penetration into the circuit.
Wait until the cooling system is completely drained.
Connect the lower coolant outlet hose from the radiator, radiator side, and tighten the band.
Keep open the bleeds on the radiator and coolant return pipe from the heater.
Slowly pour the specified coolant into the engine coolant reservoir until fluid comes out of the bleed located on the radiator.
| Type | Component | Name | Qty. | |
|---|---|---|---|---|
| Fluid [l] | "PARAFLU" ANTI-FREEZE FLUID | Mixture of 50% PARAFLU UP /water | 4.8 |
The table shows the total quantity of coolant contained in the circuit with the level on the MAX notch on the reservoir.
Close the bleed located on the radiator.
At this point the level will be higher than the MAX notch.
Continue filling until the engine coolant reservoir is completely full and fluid comes out of the bleed located on the coolant return pipe from the heater.
Close the bleed located on the coolant return pipe from the heater.
At this point the engine coolant reservoir is completely full, and so exceeds the MAX notch.
For cars with air conditioning, make sure that the air conditioner is off (OFF position).
Start the engine and let it idle for about two or three minutes.
Pump the accelerator gradually at intervals (every 30 seconds or so) up to about 3000 rpm, until the cooling fan switches on and off at least three times in order to discharge air from the system.
During this stage of the procedure the fluid in the coolant reservoir must be topped up continuously so that its level never falls below the NOTCH mark.
Continue the operation until no further changes in level are observed.
Fully tighten the cap on the engine coolant reservoir.
Pump the accelerator again for a period of 10 min., bringing the engine rpm up to about 4500 rpm.
Stop the engine
After allowing the engine to cool down, if necessary top up to the MAX notch indicating the maximum permitted level inthe expansion tank, or if there is an excess, remove using a syringe.
The quantity of fluid added must at least correspond to that recovered during draining of the system; if not, repeat the operations from starting the engine onwards.
If the coolant boils during the operations with the engine running, the operation should be stopped in order to search for and if necessary replace the faulty component which has caused this.
Once the system has been filled in accordance with the above method, the bleeds must not be unscrewed at all. The system comprises a continuous degassing pipe which discharges any air residue that may still be present in the circuit at the end of the procedure. Failure to respect this requirement will result in the level in the system being incorrect and new air penetration into the circuit.
Wait until the cooling system is completely drained.
Connect the lower coolant outlet hose from the radiator, radiator side, and tighten the band.
Keep open the bleeds on the radiator and single fluid supply and return pipe to/from the heater.
Slowly pour the specified coolant into the engine coolant reservoir until fluid comes out of the bleed located on the radiator.
| Type | Component | Name | Qty. | |
|---|---|---|---|---|
| Fluid [l] | "PARAFLU" ANTI-FREEZE FLUID | Mixture of 50% PARAFLU UP /water | 6.0 |
The table shows the total quantity of coolant contained in the circuit with the level on the MAX notch on the reservoir.
Close the bleed located on the radiator.
Continue filling until fluid comes out of the bleed located on the single fluid supply and return pipe to/from the heater.
Close the bleed located on the single fluid supply and return pipe to/from the radiator.
Proceed with refitting Refer to op. 1048A10 air cleaner filtering element - replace.
1. Add further fluid until the MAX notch is reached, indicating the maximum level permitted in the expansion tank.
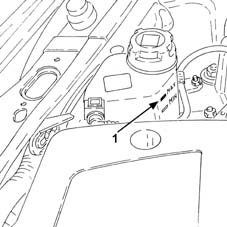
Fully tighten the cap on the engine coolant reservoir.
Start the engine and let is idle for about two minutes.
Pump the accelerator gradually at intervals (every 30 seconds or so) up to about 3000 rpm, until the cooling fan switches on and off at least three times in order to discharge air from the system.
Stop the engine
After allowing the engine to cool down, if necessary top up to reach the MAX notch, indicating the maximum permitted level in the expansion tank.
The quantity of fluid added must at least correspond to that recovered during draining of the system; if not, repeat the operations from starting the engine onwards.
Parts & tools for this job Staging For 2003 Lancia Ypsilon
- FLUIDCoolantSearch: Lancia coolant antifreeze
- PARTThermostatSearch: Lancia Ypsilon 2003 thermostat
- TOOLCooling system pressure testerSearch: cooling system pressure tester
Links open Amazon search results in a new tab. As an Amazon Associate I earn from qualifying purchases.