
Sliding roof (assembly) - r+r
- Make
- Fiat
- Model
- Panda Factory Service Manual
- Year
- 2003–2012
- Section
- Sun roof and hood › Sliding roof (assembly) - r+r
Sliding roof (assembly) - r+r
Removing
Disconnect the battery negative terminal.
- 7040H16 roof panel lining - r r.
- 7030B18 sliding roof glass - r+r
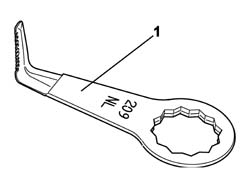
1. Fit the Fein n209 NL or equivalent blade on the vibrating knife.
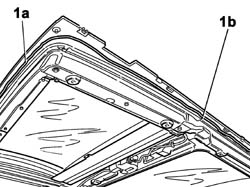
1. Working from outside the car, cut the front section of the bead of sealant (1a) and side sections (1b) of the sealant.
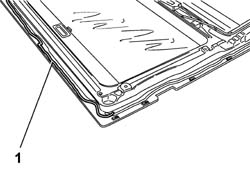
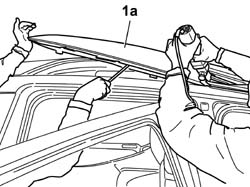
1. Working from inside the car, cut the rear section of the bead of sealant (1a).
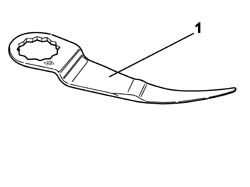
1. Fit the Fein n 168 or equivalent blade on the vibrating knife.
1. If necessary, lift the front two corners of the roof frame (1a), folding them backwards and finish cutting in the area underneath.
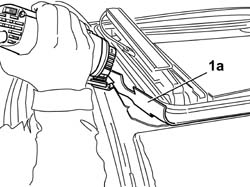
1. With the help of a second operator, who working from inside the vehicle lifts the parts of roof (1a) already free of sealant, finish cutting along the entire perimeter and remove the roof.
Refitting
1. Remove the sealant residues (1a) present on the bodyshell (1b), straighten any panels that may have been distorted during removal and if necessary repaint the areas concerned.
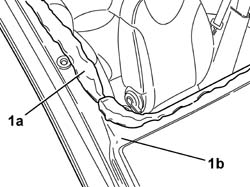
Clean with heptane the glueing surface of the ceiling.
1. Using a suitable gun (1a) (manual or pneumatic), extrude a bead of sealant (1b) of the dimensions indicated in the figure along the line of the removed sealant.
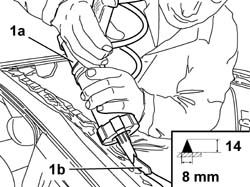
1. Fit two spacers (1a) 4 mm thick at the front of the roof.
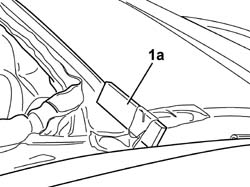
1. Using four suction pads (1a), lift the roof and position it, making sure that it rests firmly against the spacers (1b) fitted previously.
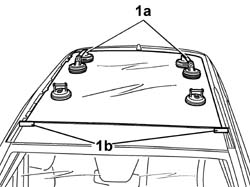
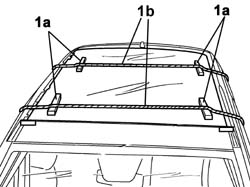
1. Fit suitable shims (1a) of a material that cannot damage the glass, and compress the roof in position using belts (1b).
Make sure that once the belts are placed under traction, that the front profile of the window is recessed in relation to the ceiling panel.
The vehicle must not be delivered until at least 24 hours have elapsed since the roof has been glued.
- 7030B18 sliding roof glass - r+r
Connect the sunroof motor electrical connections.
- 7040H16 roof panel lining - r r.
Connect the battery negative terminal.
Parts & tools for this job Staging For 2003 Fiat Panda
- TOOLTrim removal tool kitSearch: trim removal tool kit
- PARTTouch-up paintSearch: Fiat touch up paint
- PARTPanel clip assortmentSearch: Fiat panel clips assortment
Links open Amazon search results in a new tab. As an Amazon Associate I earn from qualifying purchases.