
UPPER TAILGATE ACTUATOR UNIT
- Make
- Land Rover
- Model
- Range Rover Classic
- Section
- REPAIR › UPPER TAILGATE ACTUATOR UNIT
86
ELECTRICAL
28
REPAIR
Refit
10. Fit actuator unit to mounting plate.
11. Connect multi-plug.
12. Manoeuvre actuator assembly to engage
actuator link.
13. Loosely fit actuator mounting plate to inner door
panel with four screws. Set mounting plate in
centre of slotted holes.
14. Ensure that manual operation of sill locking
control is not restricted by operation of actuator
operating rod and vice versa. Reset mounting
plate as necessary.
15. Reconnect vehicle battery.
16. Check that electrical operation of door lock
occurs when sill locking control is moved through
half of total movement. Reset mounting plate if
necessary, tighten four screws.
NOTE: Above adjustment ensures that full
tolerance on switching operation is
utilised.
REAR DOOR ACTUATOR UNITS
Service repair no - 86.26.09
Instructions as for front doors with following
exceptions:
1. Electrical cable and plug is retained and is
accessible through large opening in door.
2. Instruction 16 does not apply to rear actuator
units which are not fitted with switches.
NOTE: Actuator may be detached from
mounting plate to facilitate removal of lock
actuator from connector rod.
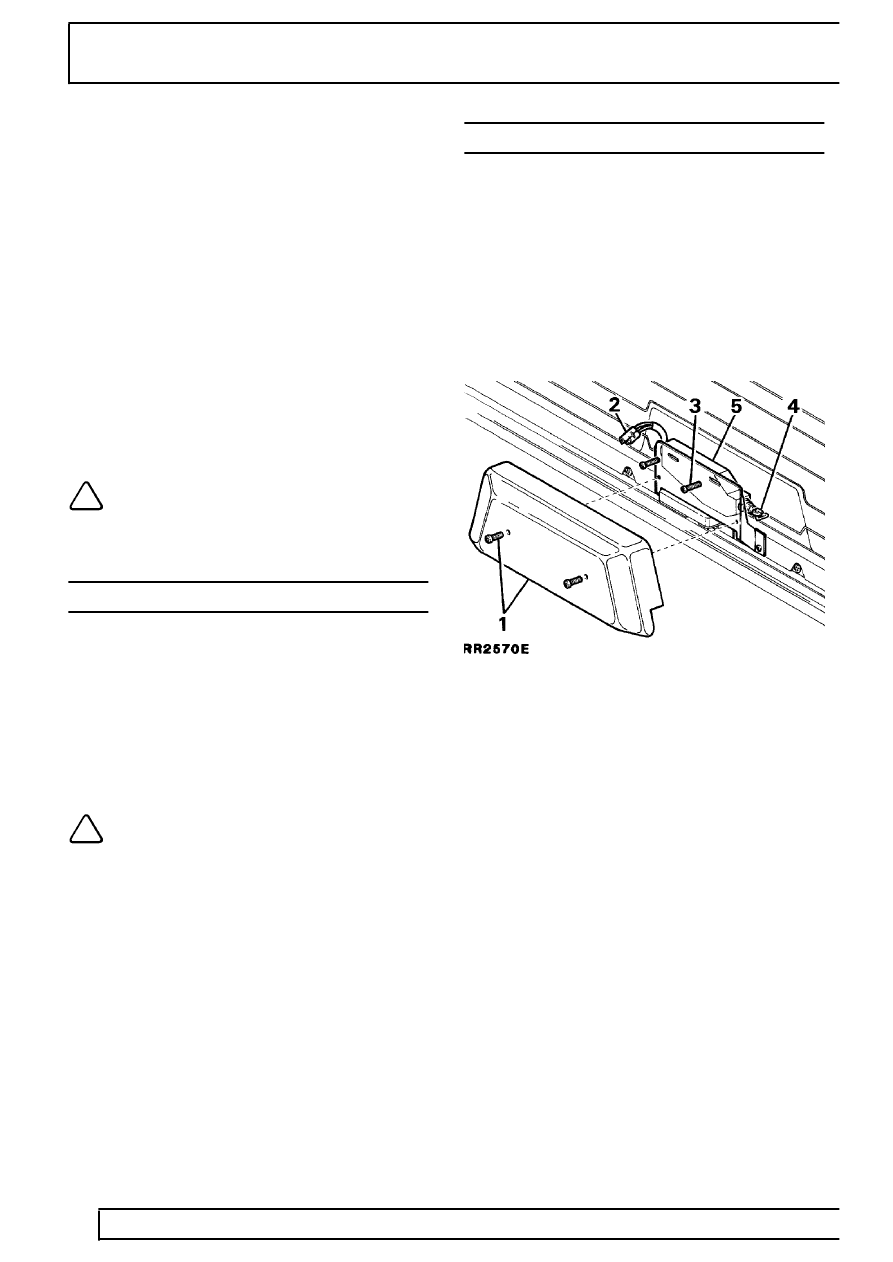
UPPER TAILGATE ACTUATOR UNIT
Service repair no - 86.26.10
Remove
1. Remove two screws and trim covering to gain
access to actuator.
2. Disconnect electrical connection.
3. Remove two actuator retaining screws.
4. Manoeuvre actuator assembly link from actuator
link.
5. Withdraw tailgate actuator unit.
Refit
6. Reverse removal procedure.
7. Check operation of central locking system.
Parts & tools for this job Staging For Land Rover Range Rover
- TOOLDigital multimeterSearch: automotive digital multimeter
- PARTAssorted fuse kitSearch: car fuse assortment kit
- TOOLWire crimper and connector kitSearch: wire crimper connector kit
Links open Amazon search results in a new tab. As an Amazon Associate I earn from qualifying purchases.