
LEVELLING UNIT BALL JOINTS
- Make
- Land Rover
- Model
- Range Rover Classic
- Section
- REPAIR › LEVELLING UNIT BALL JOINTS
REAR SUSPENSION
3
REPAIR
LEVELLING UNIT BALL JOINTS
Service repair no - 64.30.10
Remove
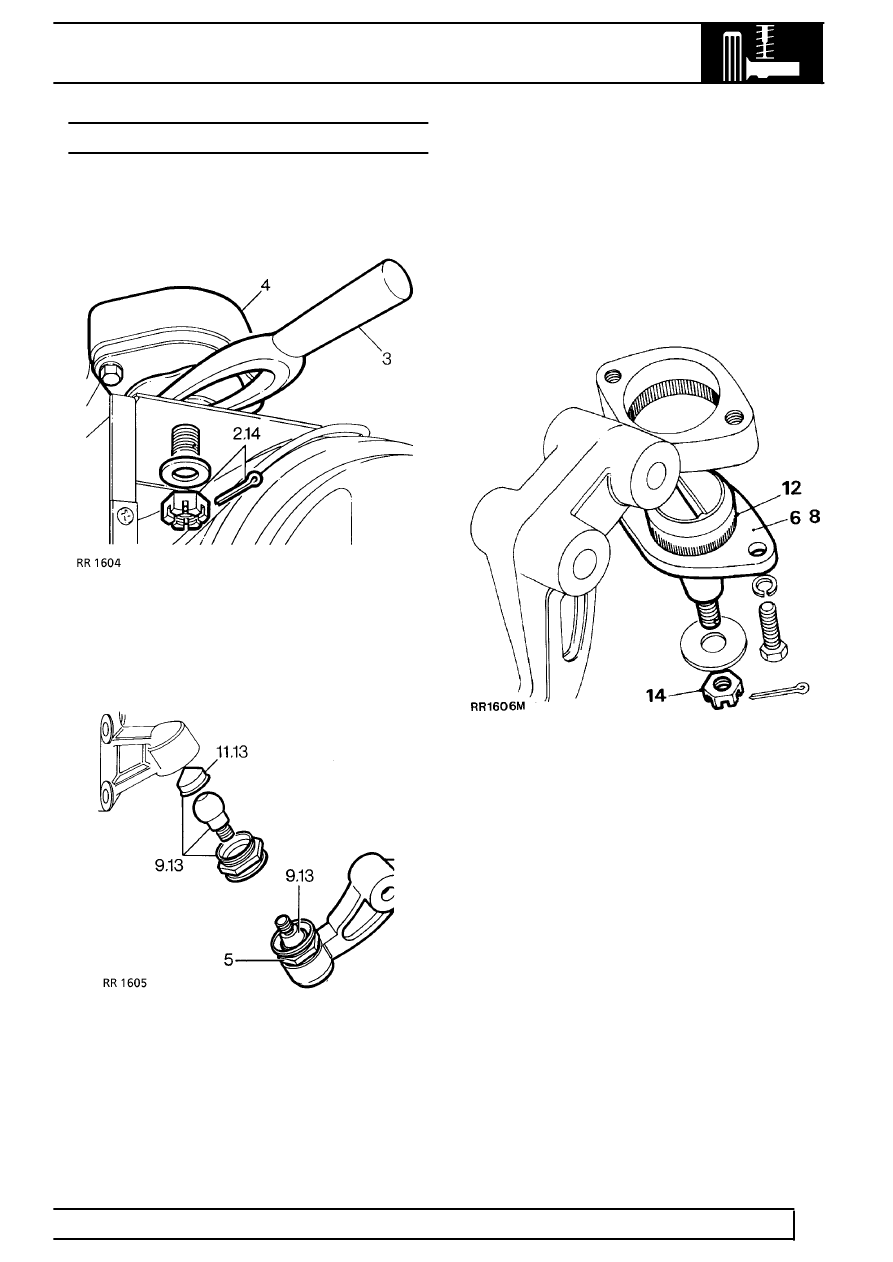
1. Remove levelling unit.
See Levelling Unit
2. Remove cotter pin and nut at rear axle bracket.
3. Extract ball pin from axle bracket using extractor
RO1006.
4. Withdraw pivot bracket with ball joints.
5. Unscrew ball joint assembly.
6. Remove ball joint assembly from axle bracket.
7. Replacement ball joints are supplied complete,
less fixings, and greased.
8. Axle bracket ball joint must not be dismantled.
9. Levelling unit ball joint may be dismantled and
cleaned.
10. Pack ball joint with Dextagrease GP or
equivalent grease.
11. Ensure that ball is square in housing before
refitting.
Refit
12. Press knurled ball joint into pivot bracket.
13. Screw levelling unit ball joints into mounting
brackets. Ball joints should screw in easily and
fully. Tighten to correct torque.
See
Specifications, torque, Torque Values
14. Fit pivot bracket complete with ball joints to rear
axle. Tighten to
175Nm.
15. Fit levelling unit.
Parts & tools for this job Staging For Land Rover Range Rover
- TOOLTie rod end toolSearch: tie rod end puller
- TOOLBall joint separatorSearch: ball joint separator
- FLUIDPower steering fluidSearch: Land Rover power steering fluid
Links open Amazon search results in a new tab. As an Amazon Associate I earn from qualifying purchases.