
BATTERY
- Make
- Land Rover
- Model
- Defender 300Tdi Defender
- Section
- BATTERY
86
ELECTRICAL
2
REPAIR
BATTERY
Service repair no - 86.15.01
NOTE: If the vehicle is fitted with a battery
backed-up alarm sounder, disconnecting
the vehicle battery will cause the alarm to
sound unless the following procedure is followed:
1. Remove LH front seat cushion.
2. Release retaining clip and remove battery
access cover.
3. Slacken battery negative lead clamp bolt.
4. Turn starter switch ’on’.
5. Turn starter switch ’off’ and remove key.
6. Disconnect battery WITHIN 15 SECONDS.
If alarm is accidentally activated, ensure sounder is
connected and silence by turning the starter switch to
position ’II’.
Remove
WARNING: During battery removal or
before carrying out any repairs or
maintenance to electrical components
always disconnect negative lead first. If positive
lead is disconnected with negative lead in place,
accidental contact of a wrench to any grounded
metal part could cause a severe spark, possibly
resulting in personal injury. Upon installation of
battery always connect positive lead first.
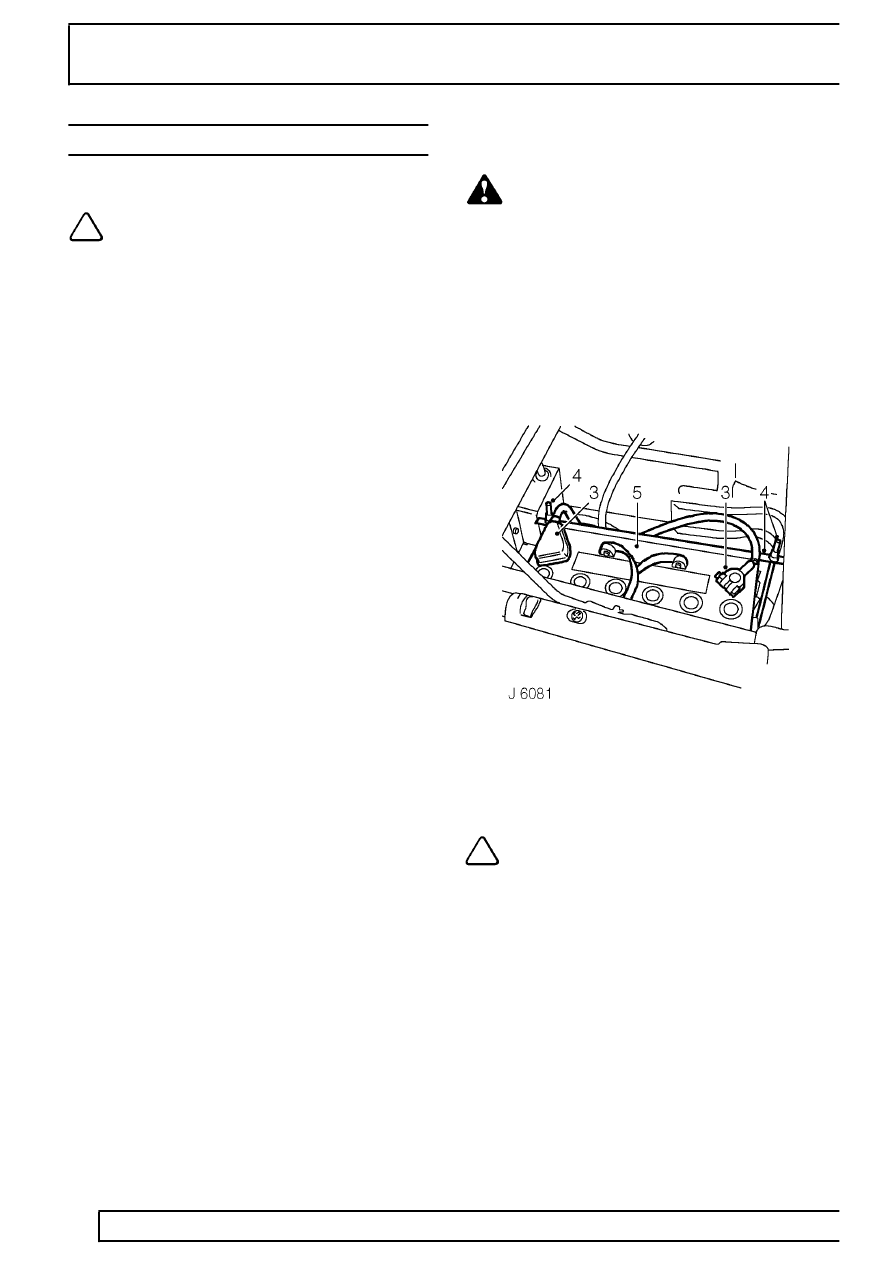
1. Remove LH front seat cushion.
2. Release retaining clip and remove battery
access cover.
3. Disconnect both battery leads, negative first.
4. Slacken securing nuts and move battery clamp,
with ’J’ bolts aside.
5. Remove battery.
NOTE: Coat battery clamps and terminals
with petroleum jelly before refitting.
Refit
6. Position battery and secure with clamp. Ensure
’J’ bolts are hooked correctly under retaining
brackets on base of battery box.
7. Reconnect battery leads, positive lead first.
8. Fit battery access cover.
9. Fit seat cushion.
Parts & tools for this job Staging For Land Rover Defender
- TOOLBattery testerSearch: car battery tester
- TOOLDigital multimeterSearch: automotive digital multimeter
- TOOLBattery terminal cleanerSearch: battery terminal cleaner
Links open Amazon search results in a new tab. As an Amazon Associate I earn from qualifying purchases.