
DOOR LATCH - REAR SIDE DOOR
- Make
- Land Rover
- Model
- Defender 300Tdi Defender
- Section
- DOOR LATCH - REAR SIDE DOOR
76
CHASSIS AND BODY
6
REPAIR
6. Remove 2 screws securing remote control lever
to mounting panel.
7. Release control rods from plastic retaining clips
located in mounting panel.
8. Withdraw remote control lever and rods from
door.
Refit
9. Fit plastic retaining clips to rod assembly into
position and secure with 2 screws.
10. Connect control rods to latch assembly and
secure with clips.
11. Fit plastic retaining rod clips to mounting panel.
12. Connect control rod to locking button and secure
with clip.
13. Re-seal plastic sheet and fit door trim casing
DOOR LATCH - REAR SIDE DOOR
Service repair no - 76.37.13.
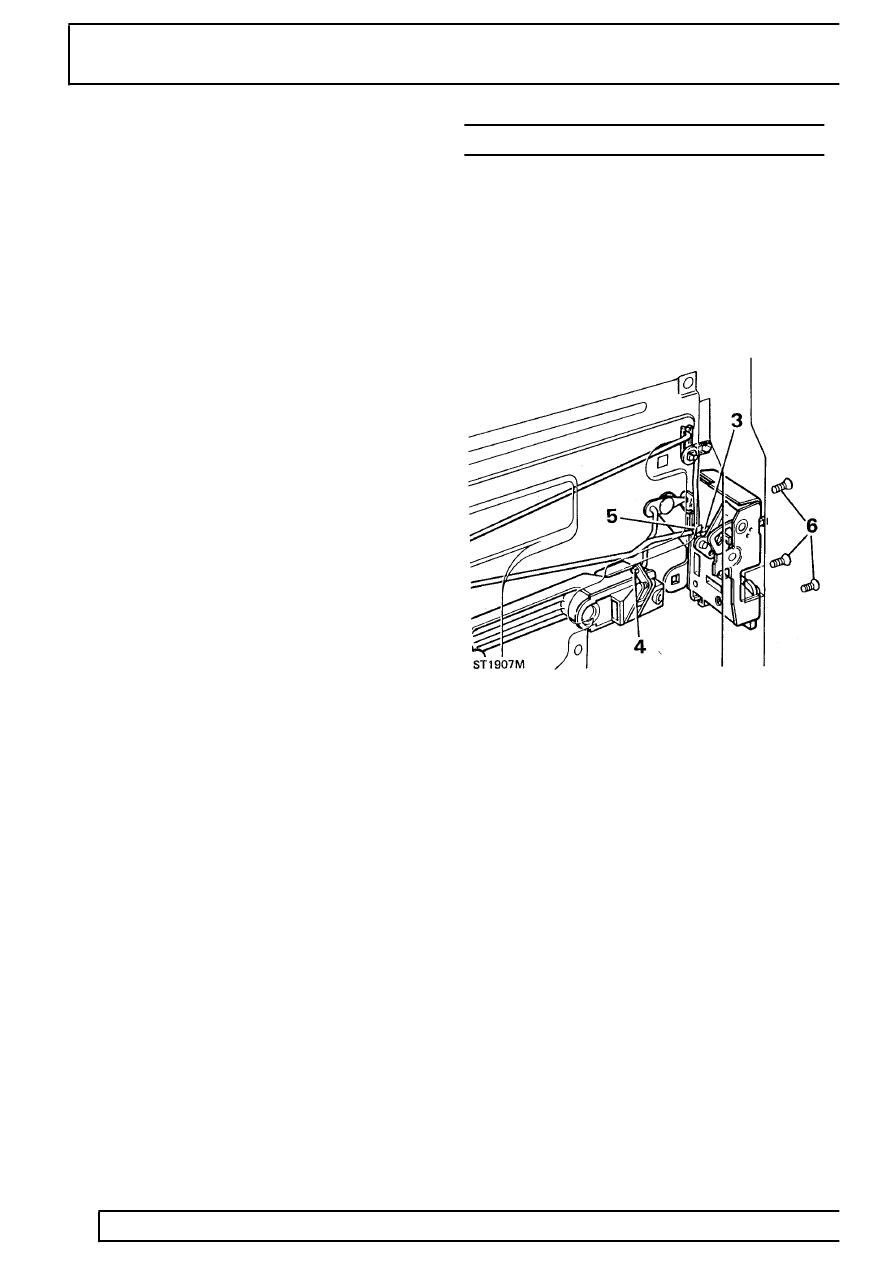
Remove
1. Remove door trim casing
See Door trim
casing .
2. Peel-back sufficient of plastic sheet to reveal
latch.
3. Release remote control lever rod from latch
assembly.
4. Disconnect door outer handle control rod from
latch assembly.
5. Disconnect door locking button remote control
rod from latch mechanism.
6. Remove 3 retaining screws and withdraw latch
assembly from door.
Refit
7. Fit latch assembly to door and secure with 3
screws, noting that uppermost screw is longer.
8. Connect remote control levers to latch
mechanism reversing instructions 3, 4 and 5.
9. Re-seal plastic sheet and fit door trim casing
See Door trim casing .
Parts & tools for this job Staging For Land Rover Defender
- TOOLTrim removal tool kitSearch: trim removal tool kit
- PARTTouch-up paintSearch: Land Rover touch up paint
- PARTPanel clip assortmentSearch: Land Rover panel clips assortment
Links open Amazon search results in a new tab. As an Amazon Associate I earn from qualifying purchases.