
SIDELIGHT AND FLASHER LAMP ASSEMBLY AND BULB
- Make
- Land Rover
- Model
- Range Rover Classic
- Section
- REPAIR › SIDELIGHT AND FLASHER LAMP ASSEMBLY AND BULB
ELECTRICAL
9
REPAIR
Refit
11. Fit a new bulb. Ensure two notches on bulb body
locate with registers on lamp unit.
12. Reverse removal procedure.
Adjust
Correct adjustment is beam horizontal (parallel to
ground) and parallel to vehicle axis.
13. Loosen lamp adjusting bolt to lower or raise
beam.
14. Loosen lamp securing bolt to move beam to left
or right.
15. Tighten fixing bolts to
15 Nm.
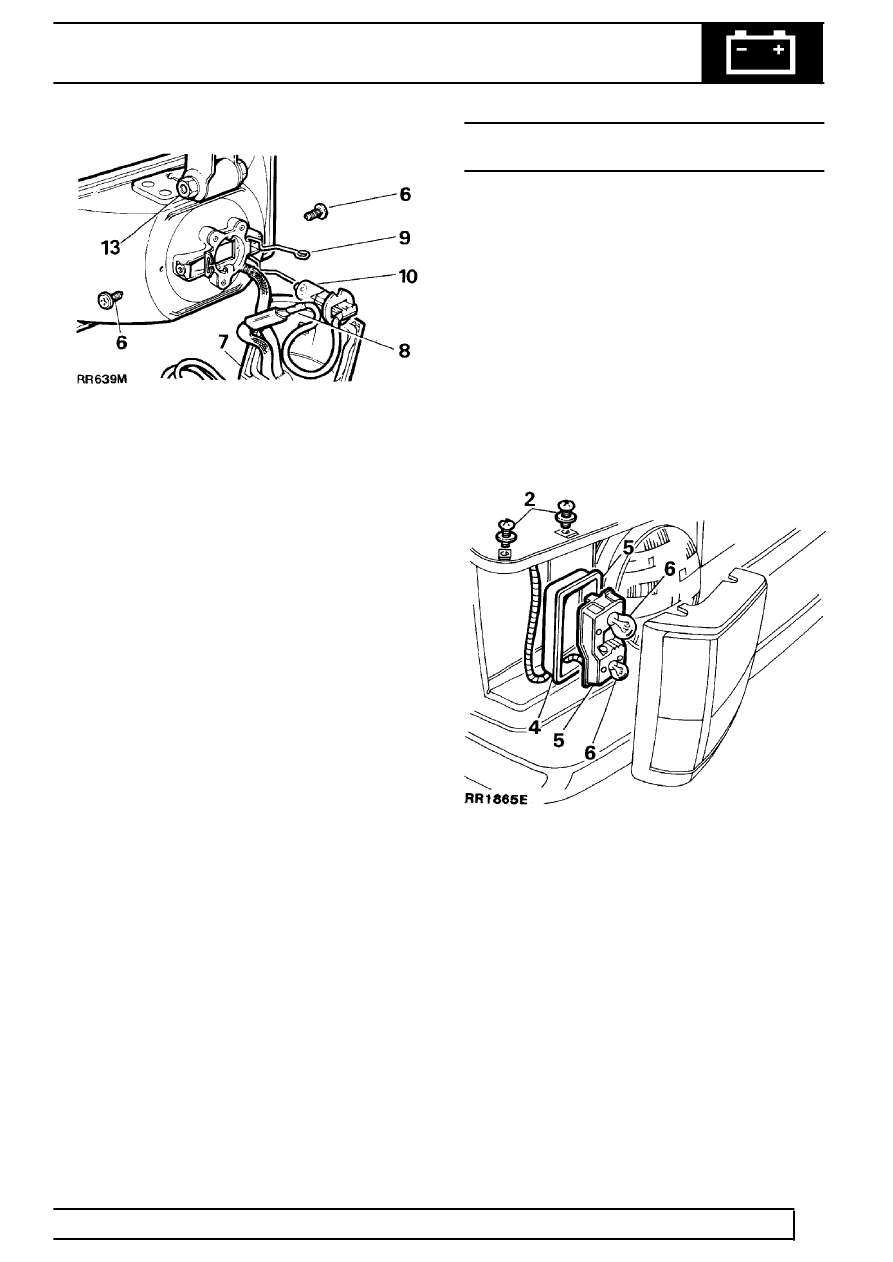
SIDELIGHT AND FLASHER LAMP ASSEMBLY
AND BULB
Service repair no - 86.40.24
Remove
1. Disconnect battery negative lead.
2. Remove two screws and plain washers securing
lamp assemly.
3. Lift assembly away sufficiently to gain access to
rear of lamp.
4. Remove waterproof cover.
5. Depress two retaining clips and withdraw bulb
holder.
6. Remove required bulb. Direction indicator bulb is
located in upper section of bulb holder, side
lamp bulb in lower.
7. Disconnect multi-plug. Remove complete
assembly.
Refit
8. Reverse removal procedure. Ensure waterproof
cover is correctly located.
Parts & tools for this job Staging For Land Rover Range Rover
- PARTReplacement bulbsSearch: Land Rover Range Rover bulbs
- TOOLDigital multimeterSearch: automotive digital multimeter
Links open Amazon search results in a new tab. As an Amazon Associate I earn from qualifying purchases.