
MASTER CYLINDER
- Make
- Land Rover
- Model
- Range Rover Classic
- Section
- REPAIR › MASTER CYLINDER
70
BRAKES
2
REPAIR
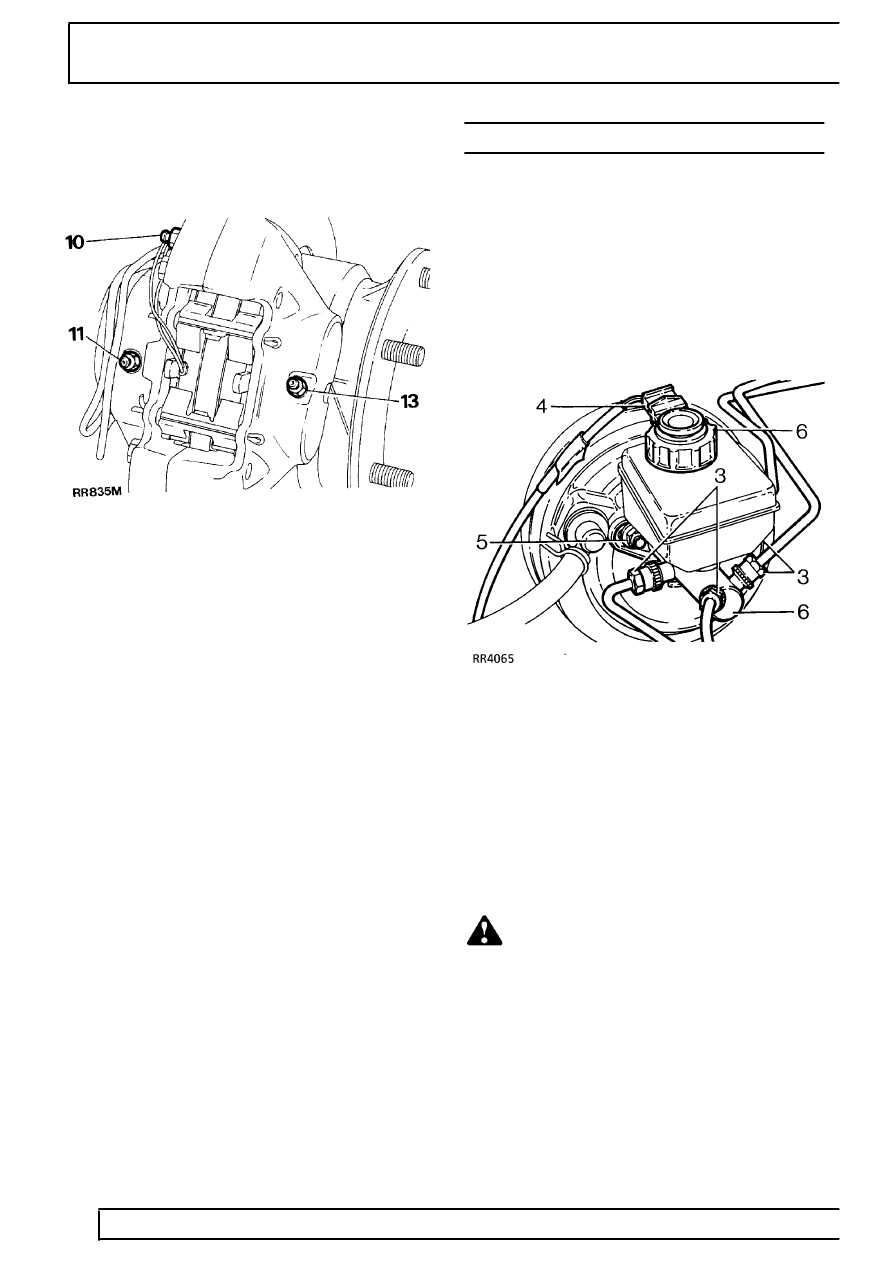
10. Connect a bleed hose to primary bleed screw on
front caliper.
11. Connect a bleed hose to secondary bleed screw
on same side of caliper as primary screw.
12. Repeat 3 to 7 for front caliper, bleeding two
screws simultaneously.
13. Connect a bleed hose to other screw on front
caliper furthest from master cylinder.
14. Repeat 3 to 7 for second secondary screw on
front caliper.
15. Refit front wheel.
16. Repeat 9 to 15 for front caliper nearest master
cylinder.
MASTER CYLINDER
- Lucas Girling - Type 25.4mm AS/AS
Service repair no - 70.30.08 - Remove
Service repair no - 70.30.09 - Repair
Remove
1. Disconnect battery negative lead.
2. Place a suitable container under master cylinder
to catch brake fluid from cylinder when brake
pipes are disconnected.
3. Thoroughly clean immediate area around all
outlet ports. Remove each brake pipe, sealing
each pipe and outlet port with suitable plugs to
prevent ingress of foreign matter.
4. Disconnect electrical plug from low fluid switch
on reservoir cap.
5. Remove two nuts securing master cylinder to
servo unit remove also spring and plain washers.
6. Detach master cylinder from servo, remove
reservoir cap and drain brake fluid into a suitable
container.
WARNING: Do not use brake fluid
previously drained or bled from system.
Carefully dispose of unwanted fluid, if
stored in a sealed container, ensure that container
is marked USED BRAKE FLUID.
Parts & tools for this job Staging For Land Rover Range Rover
- TOOLBrake bleeder kitSearch: one man brake bleeder kit
- FLUIDBrake fluidSearch: brake fluid
- TOOLBrake line flaring toolSearch: brake line flaring tool
Links open Amazon search results in a new tab. As an Amazon Associate I earn from qualifying purchases.