
SUSPENSION LINK LOWER
- Make
- Land Rover
- Model
- Range Rover Classic
- Section
- REPAIR › SUSPENSION LINK LOWER
REAR SUSPENSION
5
REPAIR
Renew bush
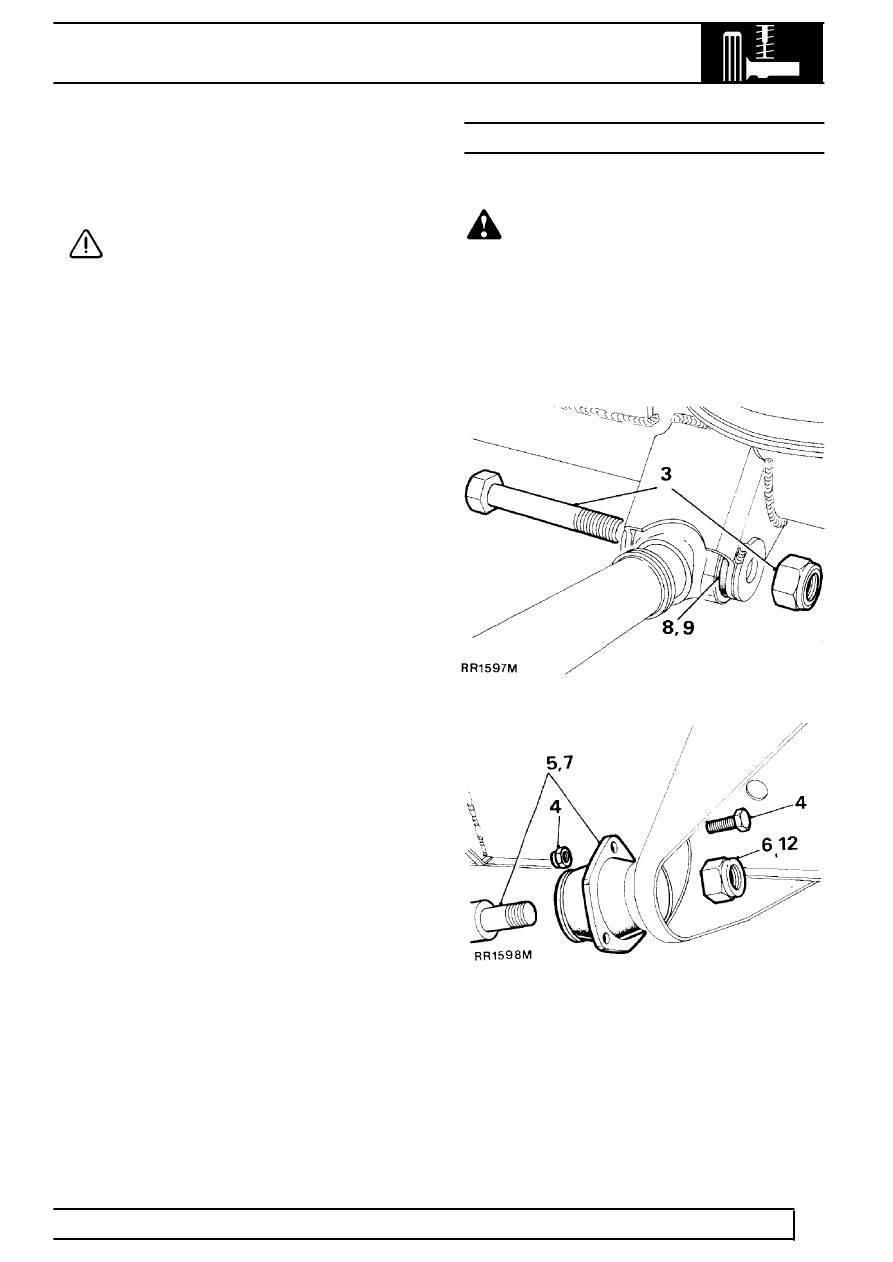
7. Press out rubber bushes.
8. Fit bush centrally in housing.
CAUTION: Apply pressure to outer edge of
bush, and not rubber inner.
Refit
9. Reverse removal procedure. 1 to 6. Do not fully
tighten fixings until all components are in
position.
10. Tighten fixings to correct torque.
See
Specifications, torque, Torque Values
SUSPENSION LINK LOWER
Service repair no - 64.35.02
WARNING: Air suspension vehicles:
Depressurise system before commencing
work.
See AIR SUSPENSION, Adjustment,
Depressurise System
Remove
1. Site vehicle on a ramp [hoist].
2. Alternatively, support vehicle on stands under
rear axle.
3. Remove rear fixings.
4. Remove mounting bracket fixings at side
member bracket.
5. Remove lower link complete.
6. Remove locknut.
7. Remove mounting bracket from lower link.
Parts & tools for this job Staging For Land Rover Range Rover
- TOOLCoil spring compressorSearch: coil spring compressor
- TOOLBall joint separatorSearch: ball joint separator
- PARTRear shock absorbersSearch: Land Rover Range Rover rear shock absorbers
Links open Amazon search results in a new tab. As an Amazon Associate I earn from qualifying purchases.