
OVERHAUL (page 8 of 14)
- Make
- Land Rover
- Model
- Range Rover Classic
41
TRANSFER GEARBOX
14
OVERHAUL
Centre differential and sprocket
- Dismantle and inspection
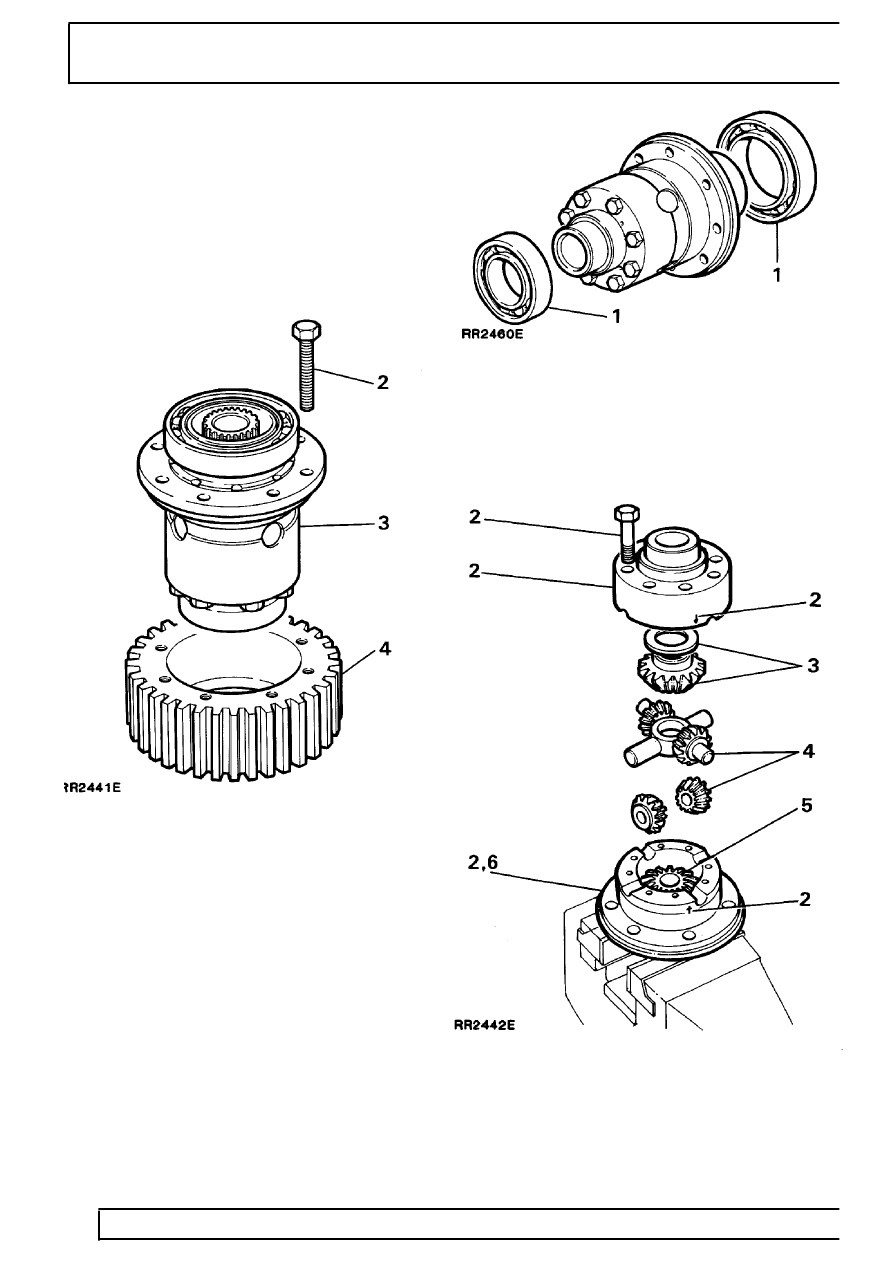
1. Place the differential unit in a vice fitted with soft
jaws. If the original components are to be refitted
mark an identification line on the sprocket and
differential unit.
2. Remove the bolts securing the sprocket to the
differential.
3. Lift the differential assembly from the sprocket.
4. Examine the sprocket teeth for wear and
damage, if either are evident renew the sprocket.
Place the sprocket aside until the differential is
ready to be assembled.
Centre differential
- Dismantle and inspection
1. Using a two legged puller, ease the bearings
from the differential assembly and discard the
bearings.
2. Secure the front half of the differential unit in a
vice fitted with soft jaws, remove the eight
retaining bolts securing the front and rear halves
of the assembly together, lift off the rear part of
the differential unit. Note the identification marks
on the exterior of the differential unit.
Parts & tools for this job Staging For Land Rover Range Rover
- TOOLTorque wrenchSearch: 3/8 inch torque wrench
- TOOLSocket setSearch: socket set metric
- BOOKHaynes manualSearch: Haynes manual Land Rover Range Rover
Links open Amazon search results in a new tab. As an Amazon Associate I earn from qualifying purchases.