
OVERHAUL (page 2 of 14)
- Make
- Land Rover
- Model
- Range Rover Classic
41
TRANSFER GEARBOX
8
OVERHAUL
Front cover main case - Assemble
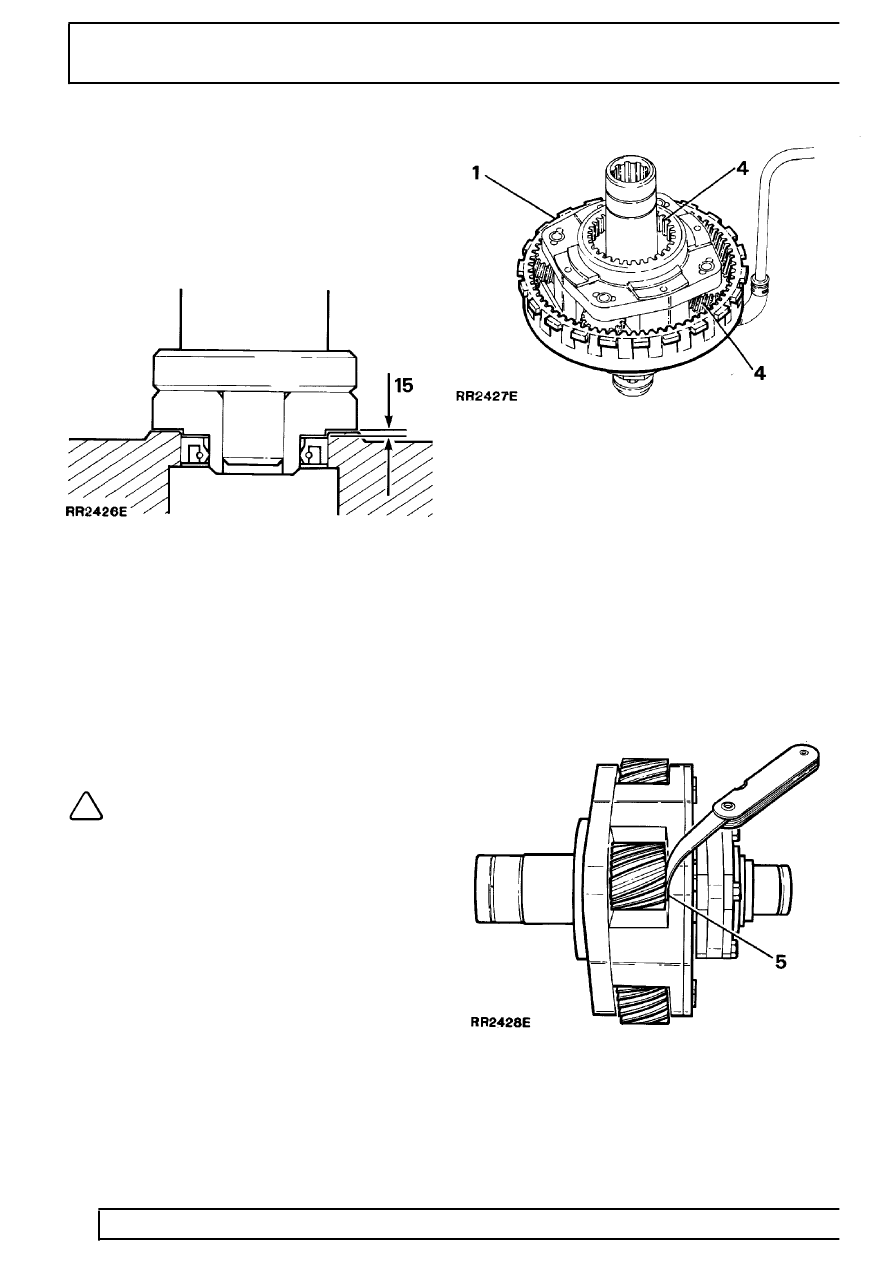
15. Lubricate a new oil seal. Using service tool LST
550 - 6 in conjunction with bearing and oil seal
replacer 18G134 fit the seal, open side of the
seal leading, until the face of the seal is 1 mm
(0.039 in) below the surface of the boss.
16. Lubricate a new needle roller bearing and drive
or press the bearing into its recess until contact
is made with the shoulder at the bottom of the
bore.
17. Fit the snap ring to retain the bearing.
18. Place the cover aside until the gearbox is ready
to be assembled.
Planetary set (Epicyclic unit) and oil pump -
Dismantle and inspection
NOTE: The Epicyclic unit and oil pump are
serviced as a complete assembly, if after
inspection either of the units is found to
be worn a complete new assembly must be fitted.
1. Remove the annulus from the planetary set.
2. Thoroughly clean all components using a
suitable solvent.
3. Examine the helical teeth of the annulus for wear
or damage. If damage is evident it will be
necessary to renew both the annulus and
planetary set.
4. Examine the planetary gears and high/low gear
teeth for wear or damage. If damaged renew
both the annulus and planetary set.
5. Check the end float of the four planet gears,
between the end of the gear and planetary set
carrier. End float of each planet gear should not
exceed 0.83 mm (0.033 in) if any one of the
planet gears is out of limits renew the planetary
set assembly.
Parts & tools for this job Staging For Land Rover Range Rover
- TOOLTorque wrenchSearch: 3/8 inch torque wrench
- TOOLSocket setSearch: socket set metric
- BOOKHaynes manualSearch: Haynes manual Land Rover Range Rover
Links open Amazon search results in a new tab. As an Amazon Associate I earn from qualifying purchases.