BodyPillar and side trim panels
| Removing and installing bottom trim panel of pillar B |
| –
| Partially loosen bottom part of trim panel for pillar A → Chapter. |
|
|
|
| –
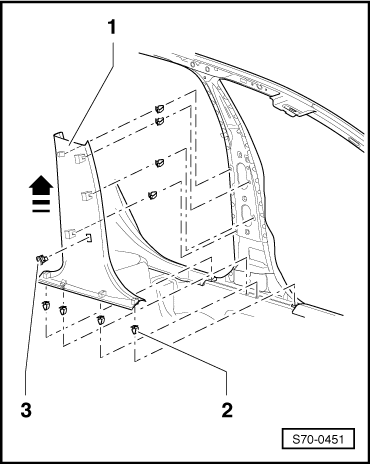
| Loosen bottom part of upper trim panel for pillar B -1-. |
| –
| Pull off top part of lower trim panel for pillar B -1-. |
| –
| Loosen top part of bottom trim panel for pillar B -1- e.g. with a long screwdriver. |
| –
| Remove bottom trim panel of pillar B -1- upwards -arrow-. |
| –
| Disconnect plug connection from interior monitoring switch (only on driver's side) -3-. |
| –
| Installation is carried out in the reverse order; pay attention to the following points: |
| –
| Recondition the clips -2- in the bottom trim panel of pillar B -1-, if necessary replace with new ones. |
|
|
|
02 Body & interior
